


 |
New Order & Dynamic Discounts
To go directly to Dynamic Discounts, Click Here!
To begin a new order click New Order from the main screen.
This brings you to the order screen (note depending on station settings, your default screen may already be this screen.)
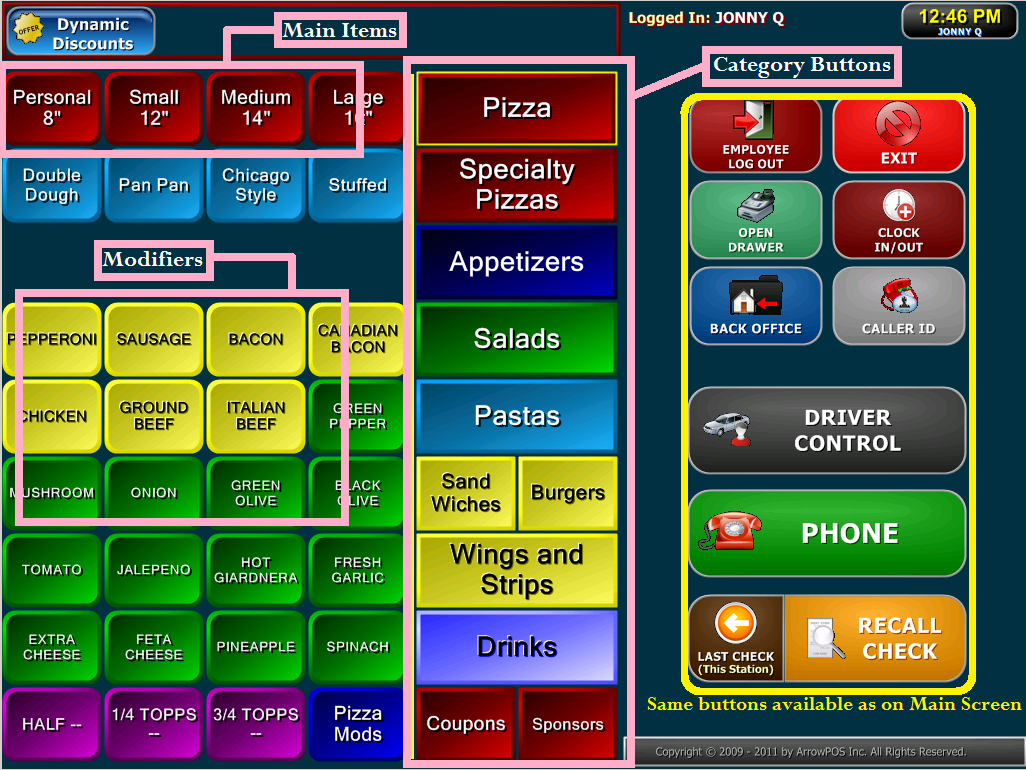
On the right panel, you see the same options available on the bottom of the main screen. These options will disappear when you select your first menu item.
The category buttons may be on the right, the top or the left depending on your menu settings.
A pizza category (shown here) is typically made up of main items (pizza
sizes) and modifiers (toppings/options).
Modifiers remain attached to a main
item and are indented to show their relationship with that main item. see
below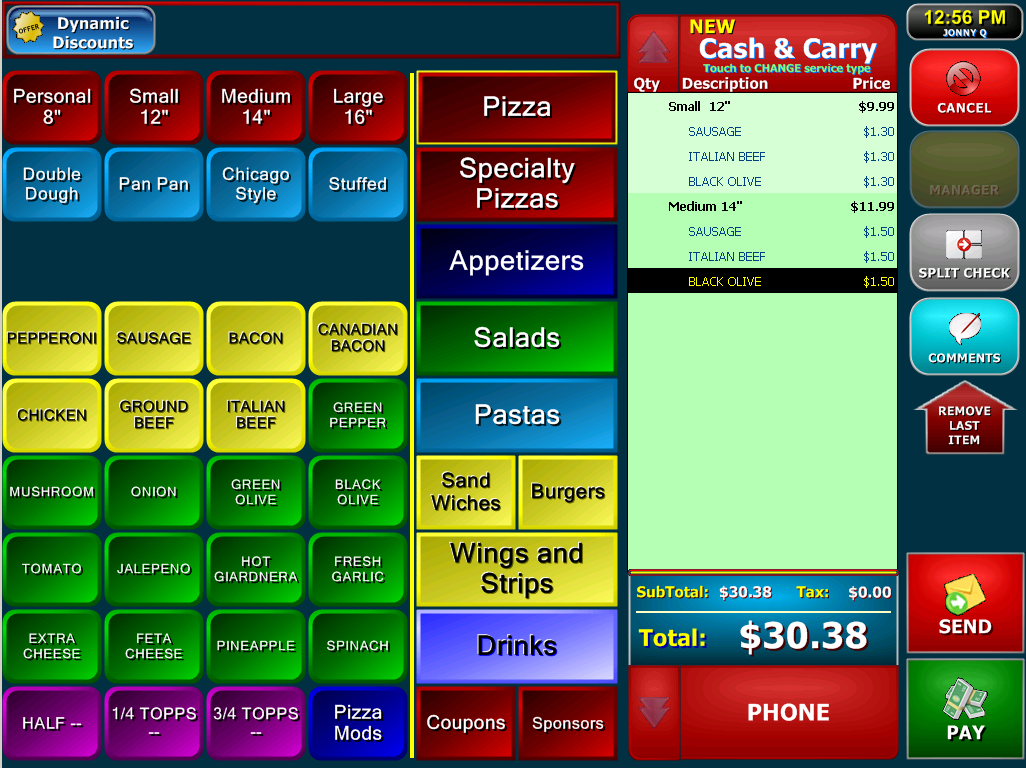
A different category such as Drinks or Appetizers may contain only main
items.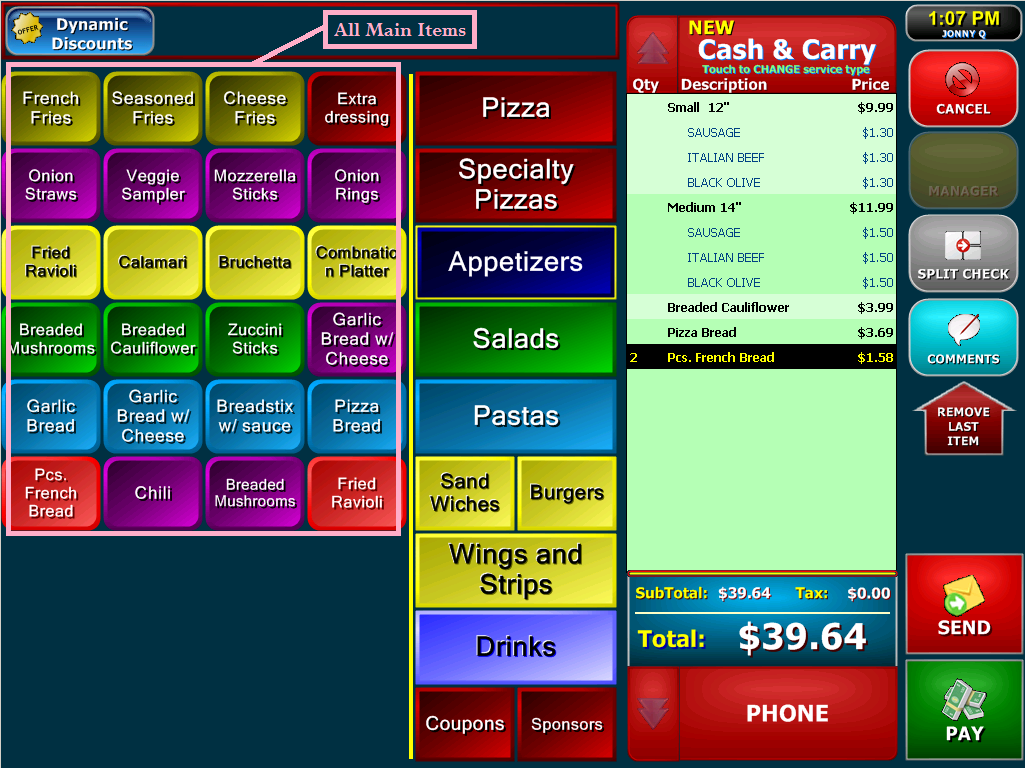
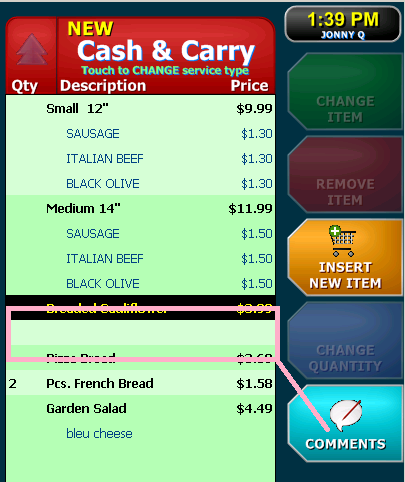
When you click on an item that is already in the order grid, a set of options
appears on the right side of the grid as shown here when I selected the Medium
14"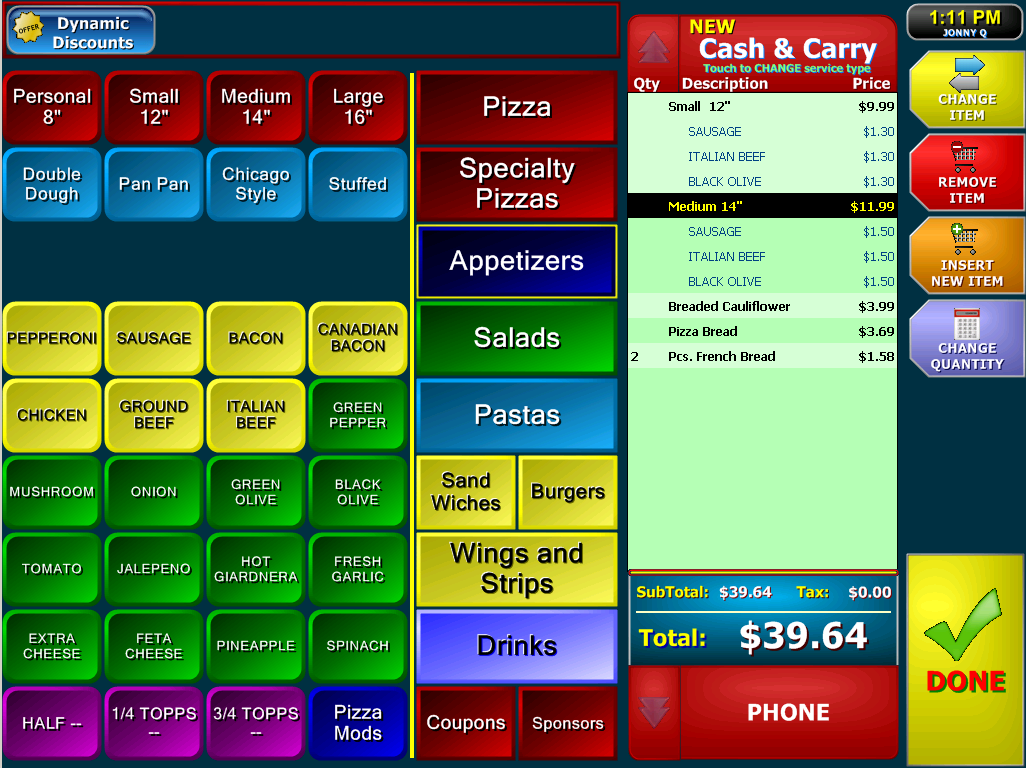
Since I have not sent the order to the kitchen yet, I can change the item to a different pizza, remove the item, Change the quantity (as shown for Pcs. French Bread), or insert a new item below what I have selected.
If I change the pizza size, the topping prices will change accordingly. (For more information on how price levels work, please see our Create Menu From Scratch Topic.)
Some buttons are used solely for navigation in a menu. The category buttons
obviously are used this way, but we can insert menu items that will perform
similarly by taking you to a chain window without ringing up on the order. In
this menu, drinks are a great example of this tool.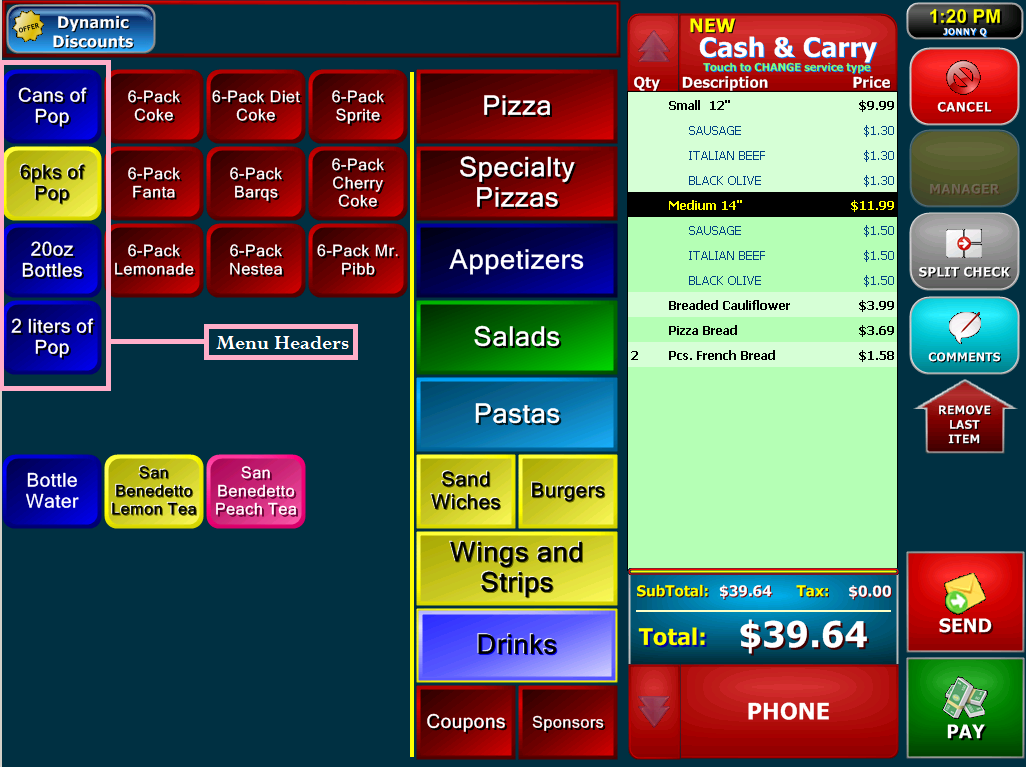
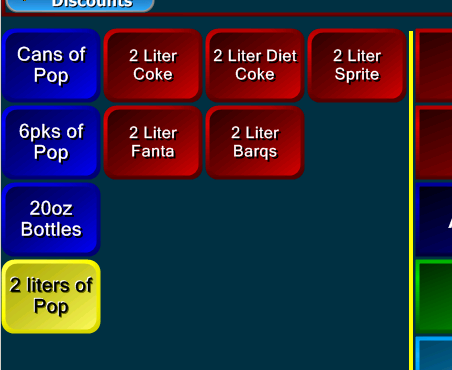
The Menu Headers can be used to create subcategories of the Drinks Category. (For More Information about how to create chain windows and Menu Headers please see our Create Menu From Scratch Topic.)
Occasionally, you will appear to be "stuck" on a screen. This happens when a
"force modifier" is in use.
For example, Salads may force you to choose a
dressing, as shown here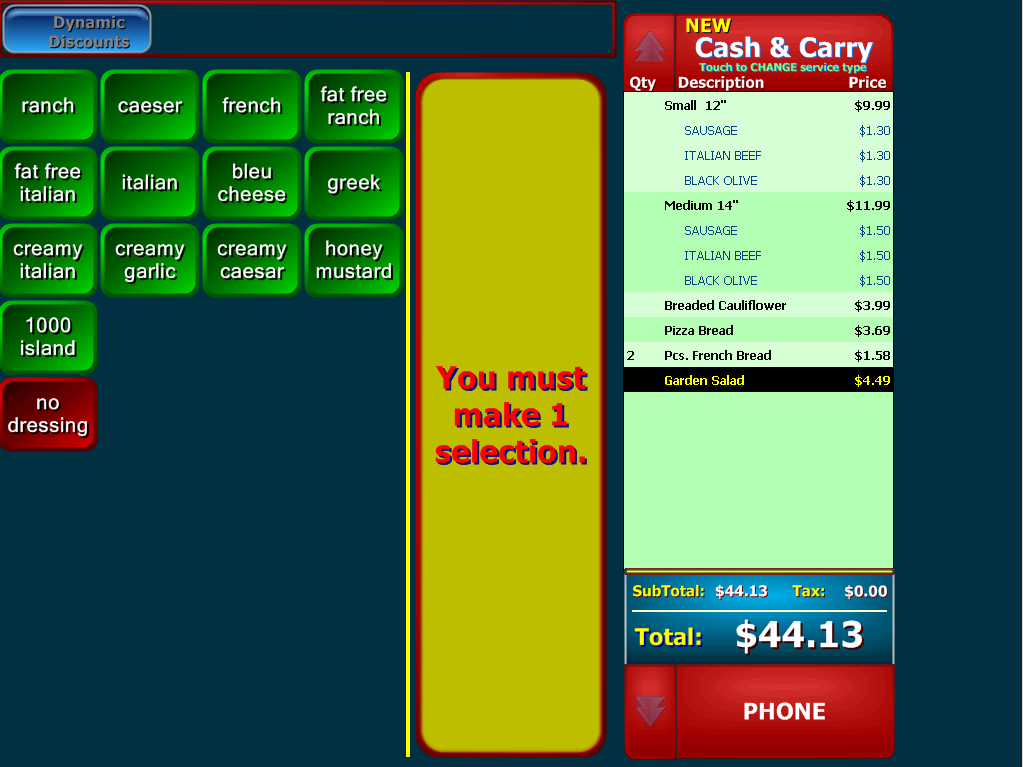
the only way out of this screen is to choose a dressing. If you
rang up the wrong salad, go ahead and choose a dressing and then you will be
able to select the remove last item button ![]() twice to remove both the dressing and the salad.
twice to remove both the dressing and the salad.
|
You can also add or insert comments to an item. Hitting the normal comment button will add the comment to the last item in the order.
You can insert a comment by clicking on the item, Clicking insert New Item, and Clicking the Comments button that appears. That will insert the comment directly below whatever you have selected. |
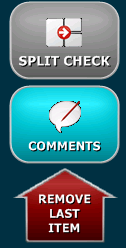
The Split Check Feature allows you to divide a check's totals according to
items. As of version 7.0.0.109, a single item cannot be split among multiple
people. The split check button simply needs to be selected after each portion of
the check. The system will ask you for a name.
Please Note: You cannot go
back and Insert a Split Check, so it must be done as the order is being
taken.
Delivery fees (if applicable) are divided evenly across all
splits.
See image below for example.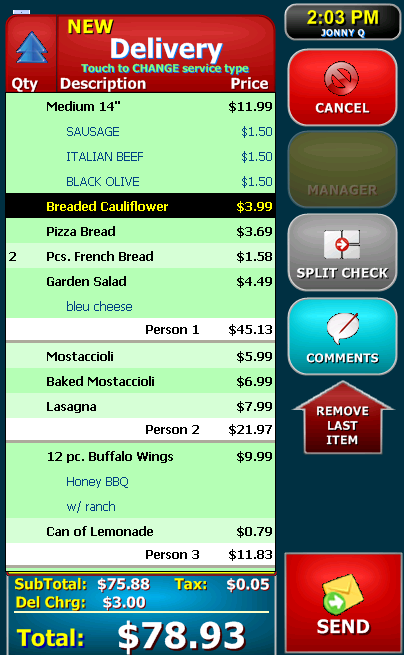
To Send and order without payment click the Send button on the lower right.
The following screen comes up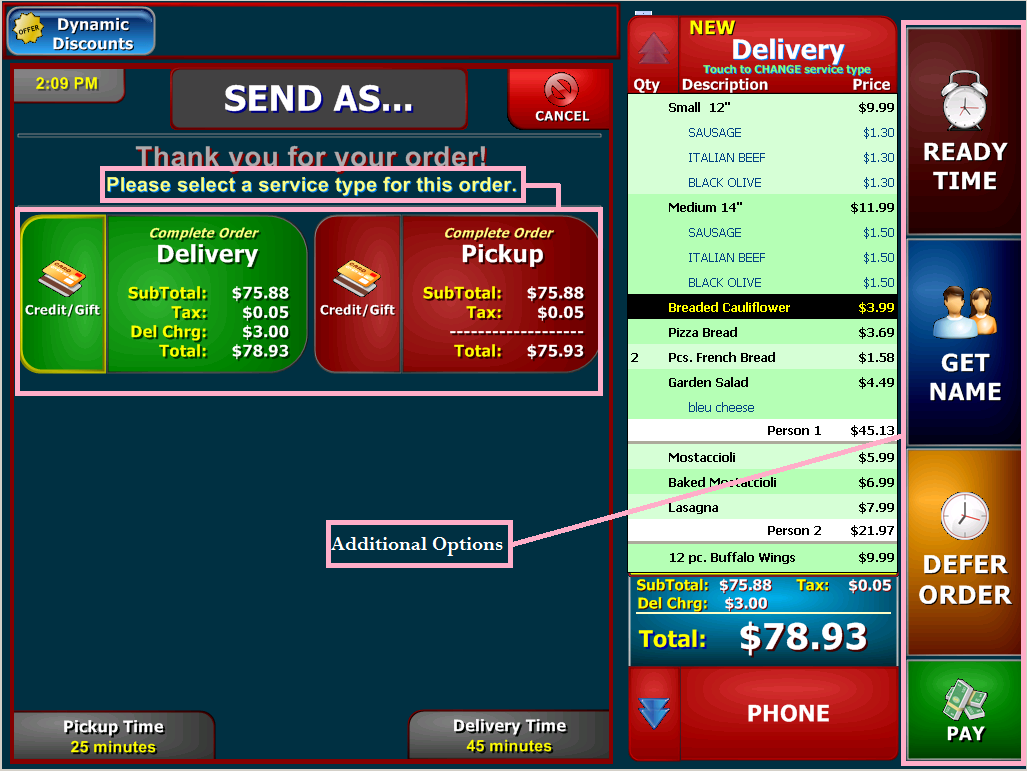
Most commonly, you only need to select a service type on this screen and you will be done. However, this screen is feature packed as well.
![]()
 View
Details
View
Details
Note the separate buttons as demonstrated by the different colored rectangles.
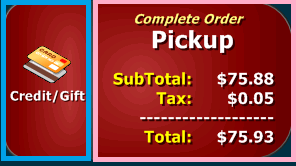
If your ArrowPOS System uses integrated credit cards, you can select the
Credit/Gift Portion of the service type button and it will take you directly to
the credit card payment screen so that you can collect the customer's card
information over the phone.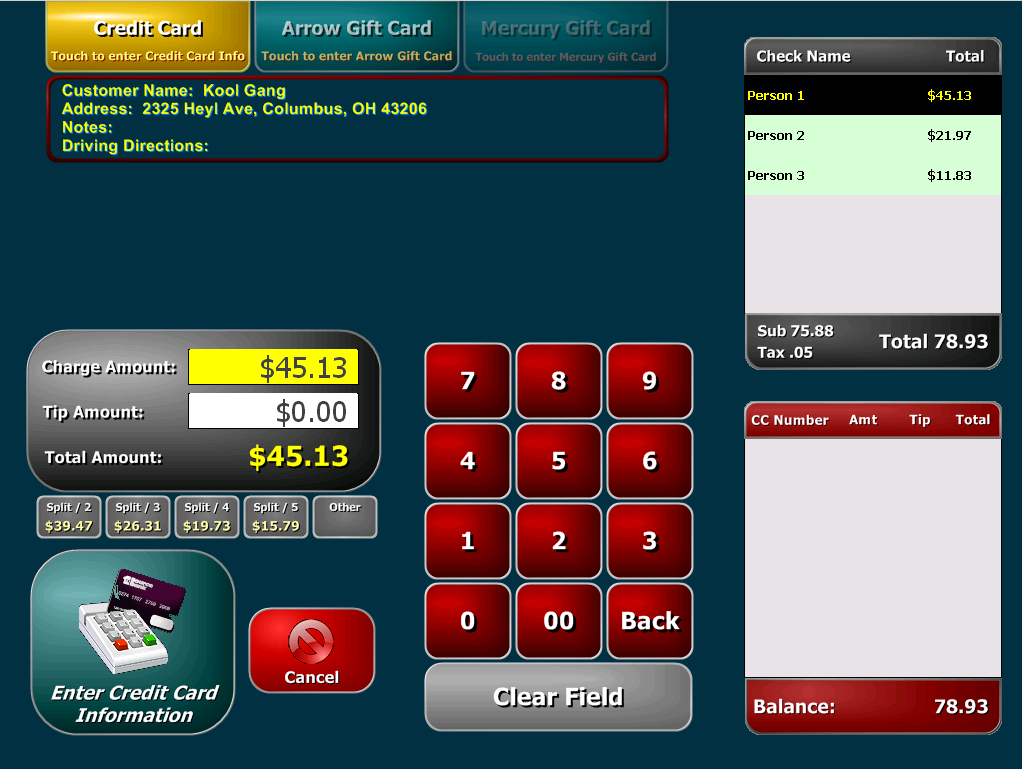
Since this order has a split check you can choose the Person on the top right and it will change the amount in the charge amount field. You can also change the amount manually by using the number pad and the clear field buttons. Lastly, notice the Split/2, Split/3, Split/4... buttons right above the enter Credit Card information button. If the customer didn't want to split the check according to items, as previously discussed, you could use these buttons to split the total check evenly across 2 or 3 or 4... people, which may be preferred.
Once you are satisfied with the charge amount on this screen, click the Enter
Credit Card Information button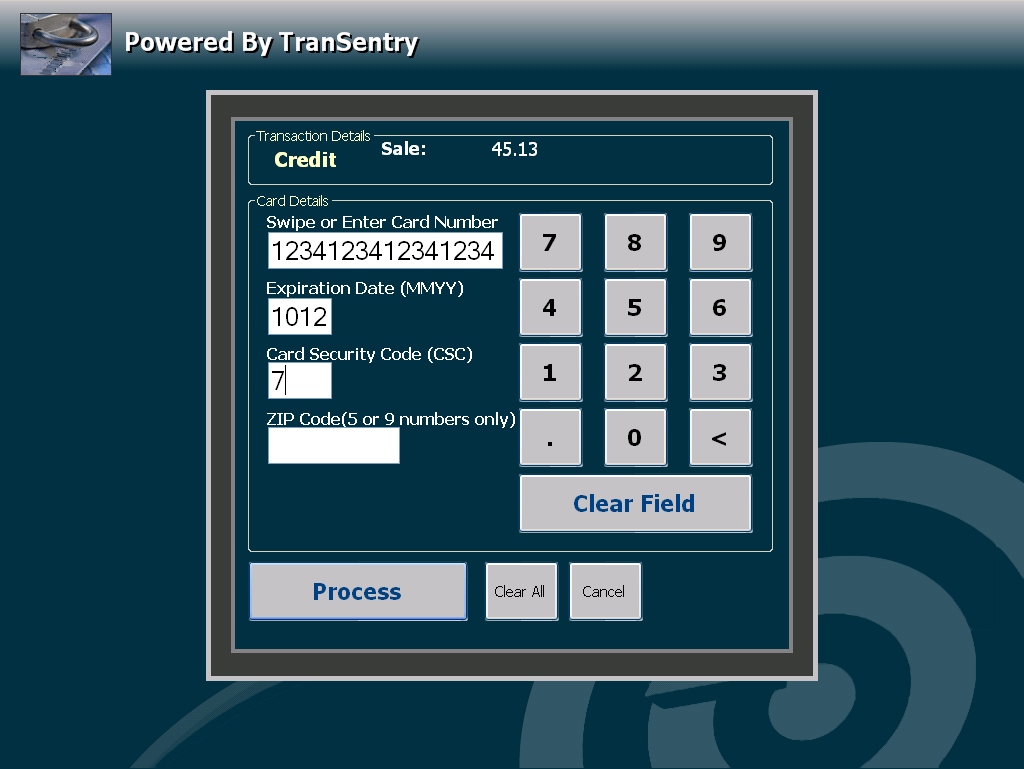
Enter the credit card info and click process.
![]()
 View
Details
View
Details
The Ready Time button allows you to quickly enter a time the order should be
delivered or picked up. This button is really intended for orders that should be
ready after the normal pickup or delivery time, but still within an
hour.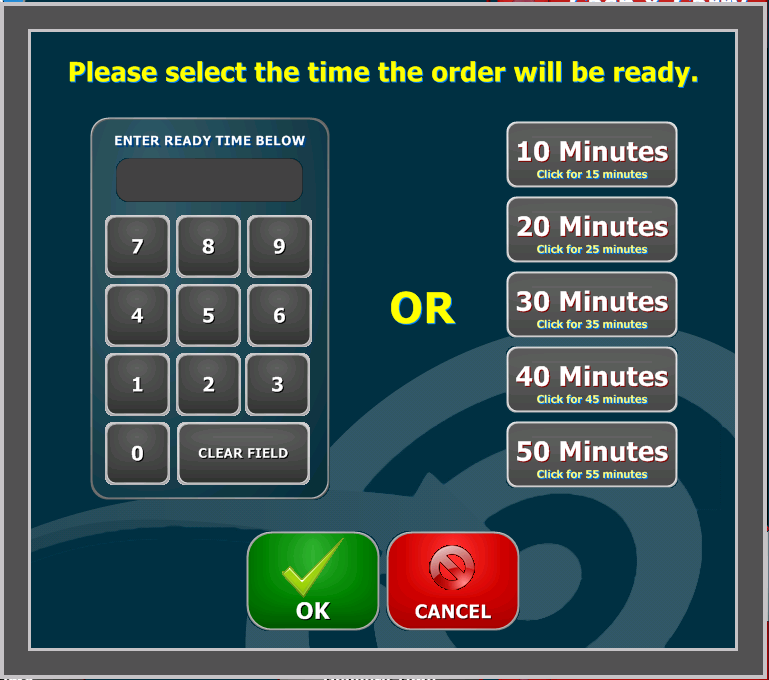
Either choose a default on the right, or enter a time manually on the left.
![]()
 View
Details
View
Details
The Get Name button is a manual way to enter a customer's
name. This is most commonly used when the customer is waiting for an order, so
that you can provide a more personal experience for your customers. Please note,
the get name feature can be turned on for every order by changing the setting in
the Customers Section of Global Configuration.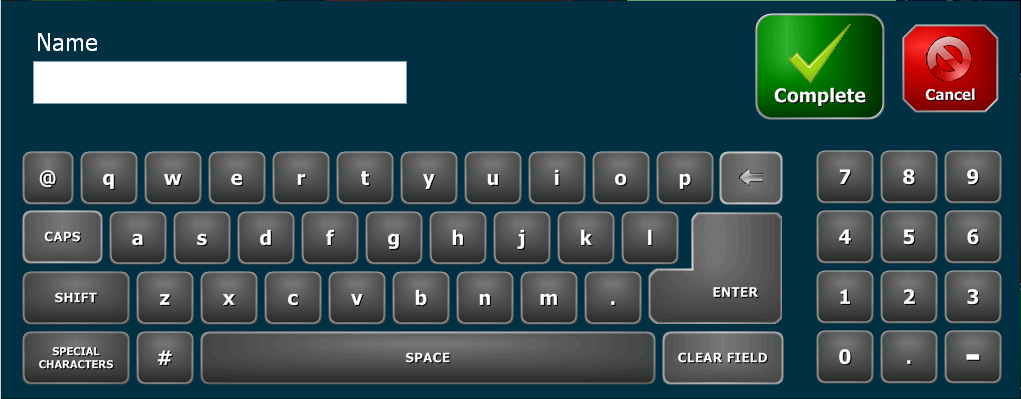
If set up correctly the name can appear along with the check
number on the kitchen ticket as well. (This is set up in the printing section of
Global Configuration.
![]()
 View
Details
View
Details
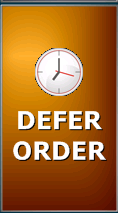
The Defer Order button can be used if a customer want's their order to be delivered/ready for pickup anywhere from an hour to 3 months or longer down the road.
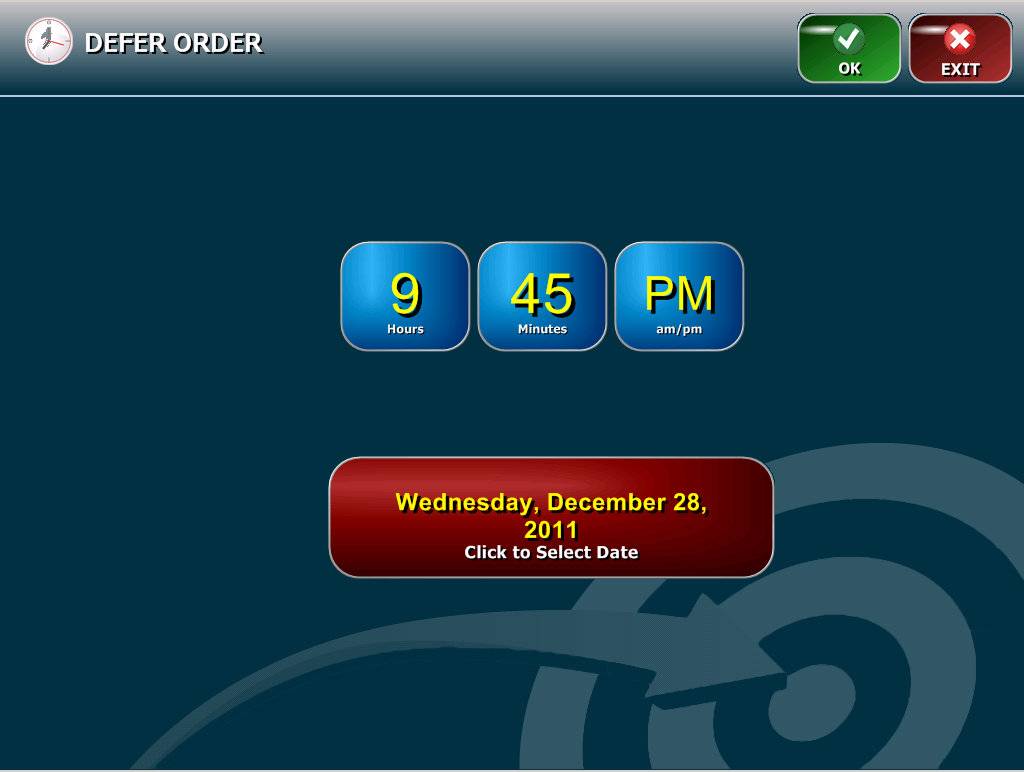
On this screen, the time is adjusted by touching on the hour, minute, or am/pm buttons. Each is a toggle button; the hour toggles 1 hour at a time, the minutes toggle 5 minutes at a time, and am/pm switches between the two options.
When you click on the date, a popup calendar appears and you can choose the date you want to defer the order to.
If orders are deferred to a different day, it depends on your printer settings as to whether the order will print automatically to the kitchen on the day you take the order. However, regardless of your printer settings the order will print on the morning the order is supposed to be ready when you hit the Start POS button.
The Pay Button  functions almost the same as the Send Button, but does not have a
Defer Order Option.
functions almost the same as the Send Button, but does not have a
Defer Order Option.
Also, after you choose the payment type, it takes you to the pay
screen.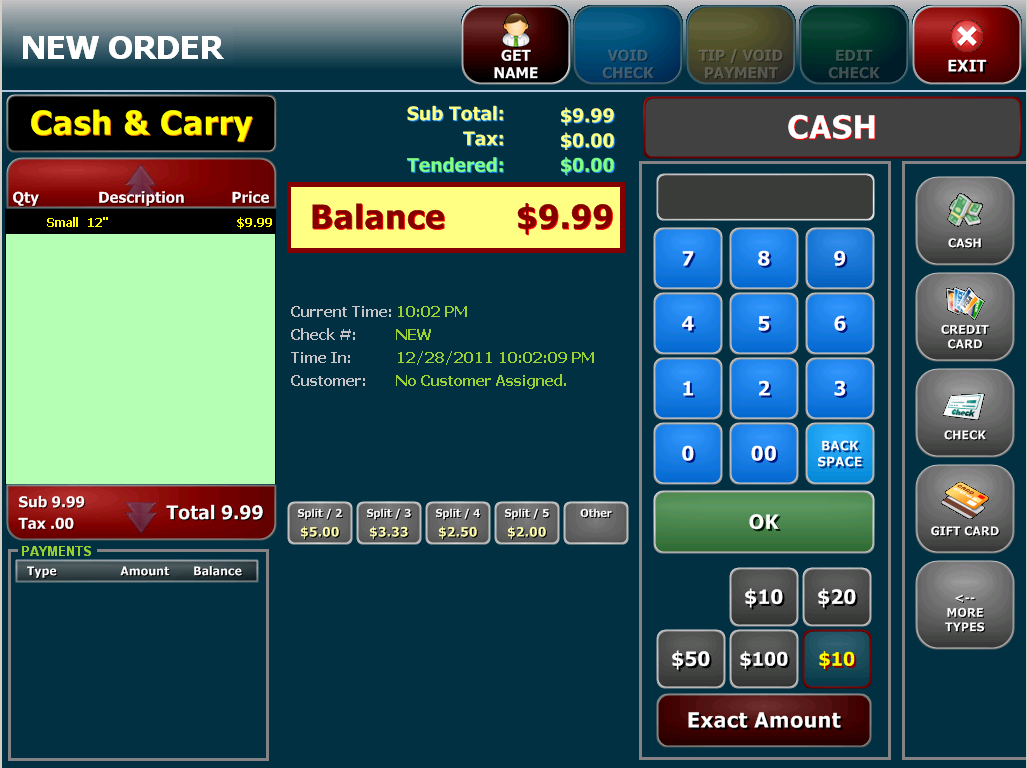 More Types>
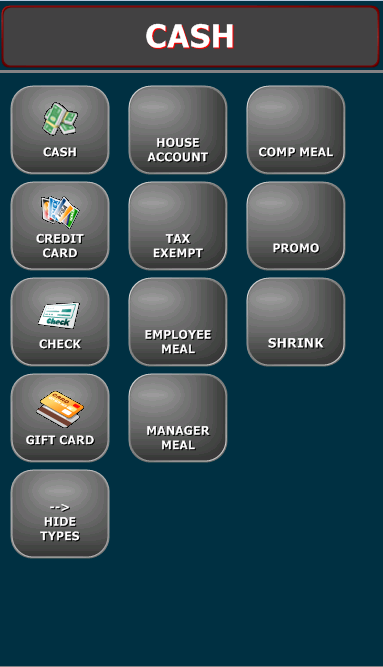
The pay screen defaults to cash as a payment type, but you can choose Credit Card, Check, Gift Card, or (under more types) several other options.
Note that if you are paying cash there are quick buttons under the keypad that cover the possible single bill tenders for the amount of the order. In this example, the order is more than $5.00 but less than $10.00 so the quick button for $5 is hidden. The bottom right quick button is always the next highest dollar.
Dynamic Discounts
Dynamic Discounts are a VERY Powerful tool. If used properly, you can control your discounts to a point where they can only be used certain hours of the day, and will only work if the correct combination of items are on the order. If a customer has a 3-topping coupon and they only want 1 topping or would like 4 toppings, the system will adjust the discount so that you never lose money on that discount! To learn how to set up Dynamic Discounts, you will need to see the Dynamic Discount Manager Topic.
To use dynamic discounts within an order, first ring up the items that you want to discount. In this example, I will ring up a Large 5-topping pizza, which has an available coupon advertised at $13.99. The normal price for the Large 5-topping pizza is $23.49.
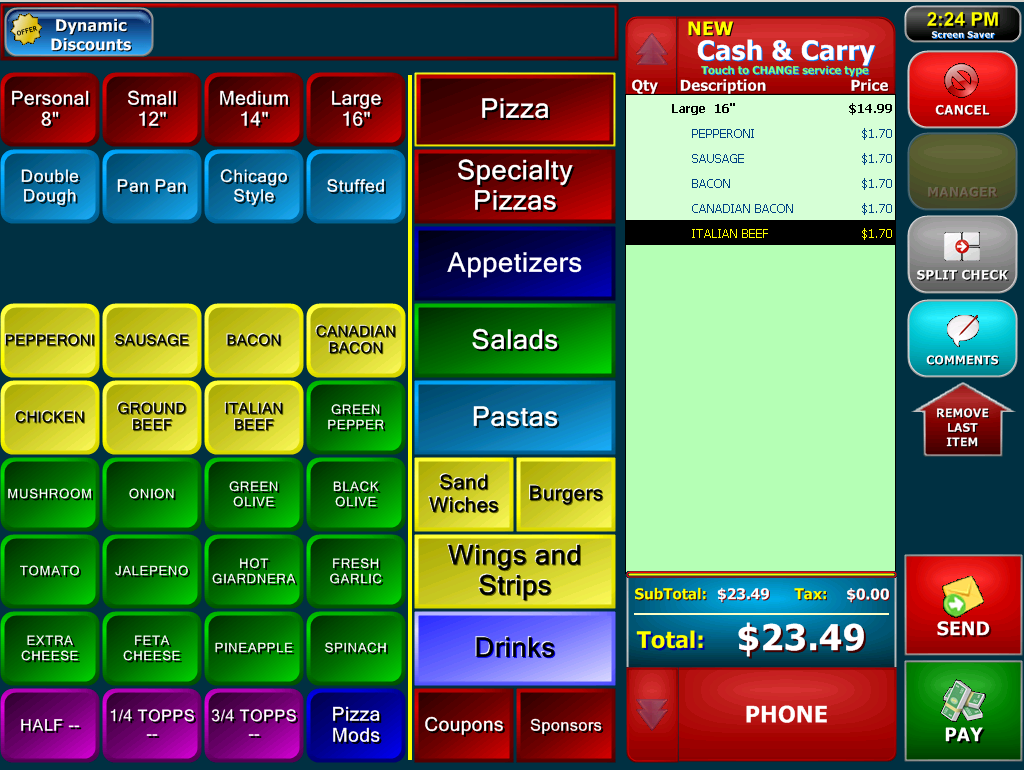
To add the Dynamic Discount to the order, click on the Dynamic Discounts button at the top.
The menu buttons are hidden temporarily by the discounts panel, as shown
below.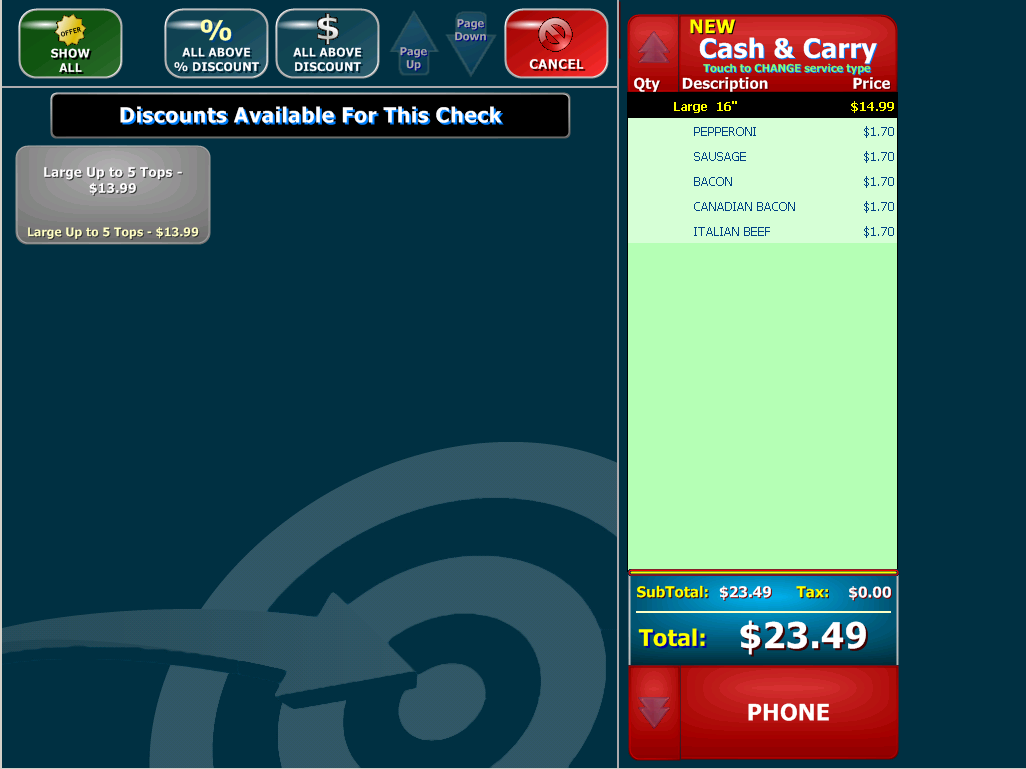
Since we have a large pizza on the order, discounts for medium pizzas,
small pizzas, etc do not show up. This makes it faster and easier to choose the
correct discount. Click the "Large Up to 5 Tops - $13.99" discount to apply
it to the order. There are 3 different examples of the same discount in the
table below, with explanations below each one.
|
|
|
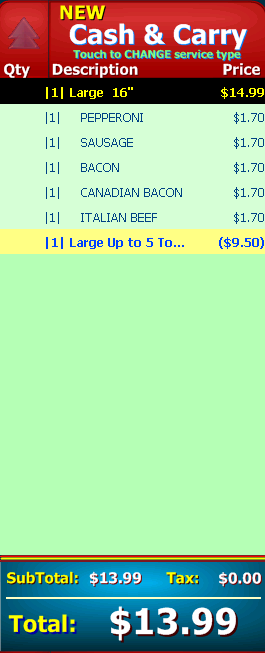
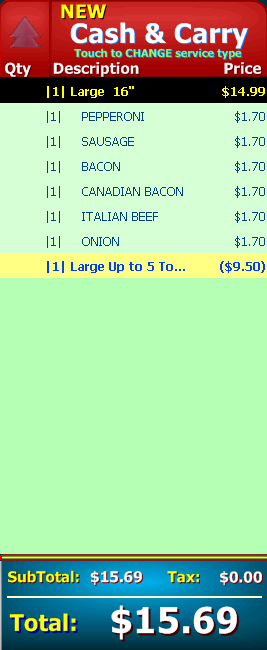
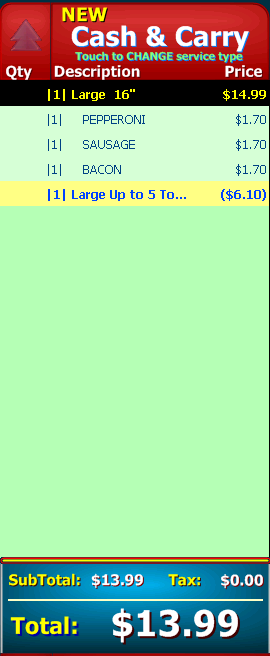
The basic example of a 5 topping pizza works as expected, reducing the price of the pizza to $13.99. | If the customer wants extra toppings it is no problem. Since the discount is set up with a Maximum Discount of $9.50, extra toppings are charged at the normal rate. | If the customer doesn't want all 5 toppings that is okay too! Our Target Price feature allows you to discount based on the coupon price. As you see here, the discount is simply less. |
A discount that involves multiple items works the same way. The only difference is that both items must be on the order before the discount appears as available.
We can also handle several other types of discounts/restrictions:
- Percentage discounts
- single item % discounts
- whole order % discounts
- whole order % discounts excluding certain items or groups of items
- Amount discounts - "$X off any order"
- One per order (yes, this is different from the next one)
- Allow other discounts (yes, this is different from the previous one)