


 |
How To Create A Menu From Scratch
If you would prefer to watch a video, please see our Topic titled Menu Creation Videos
From the main screen go to the back
office.
From the back office go to configuration.
![]() How to Create A Menu
Group
How to Create A Menu
Group
First you need to create menu groups.
To do that go to Misc Settings.
From Misc Settings go to the groups tab.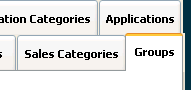
From here you need to make groups that will group all the items together and show them on reports. These will be used to show how much of that group you have sold and also set up printing. Some people want to have a group for each size of pizza and some would like all the pizzas in one group. It is all up to you how you would like to group your items. There are a few groups that you must add if they do not already exist and they are 69 Menu Header, 99 Modifier, 43 coupons, 44 Password Coupons, 45 sponsors.These will be used to show how much of that group you have sold and also set up printing. Some people want to have a group for each size of pizza and some would like all the pizzas in one group. It is all up to you how you would like to group your items. There are a few groups that you must add if they do not already exist and they are 69 Menu Header, 99 Modifier, 43 coupons, 44 Password Coupons, 45 sponsors.
Then add the groups you need. 1 Pizza, 2 Subs, etc….
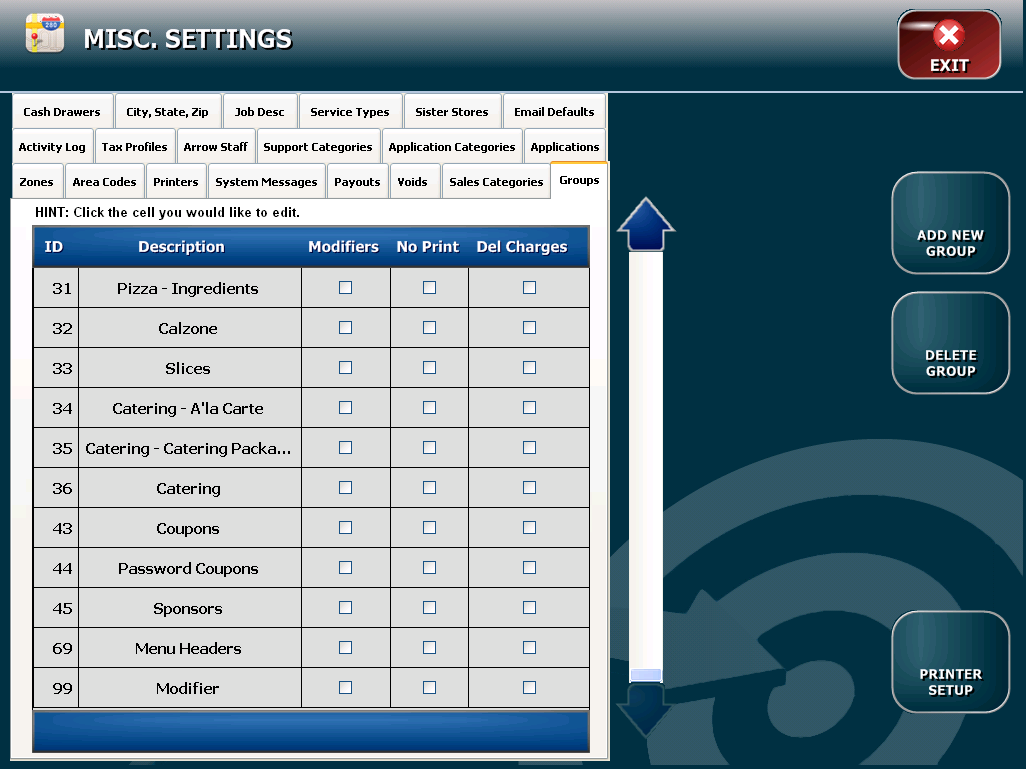
Since groups are used to control printing it is important to consider where items will be printing in the kitchen as you create and apply groups to menu items.
Once all groups have been entered, hit the exit button (top right) to go back to the configurationpage.
![]() How To Create A Menu
Item
How To Create A Menu
Item
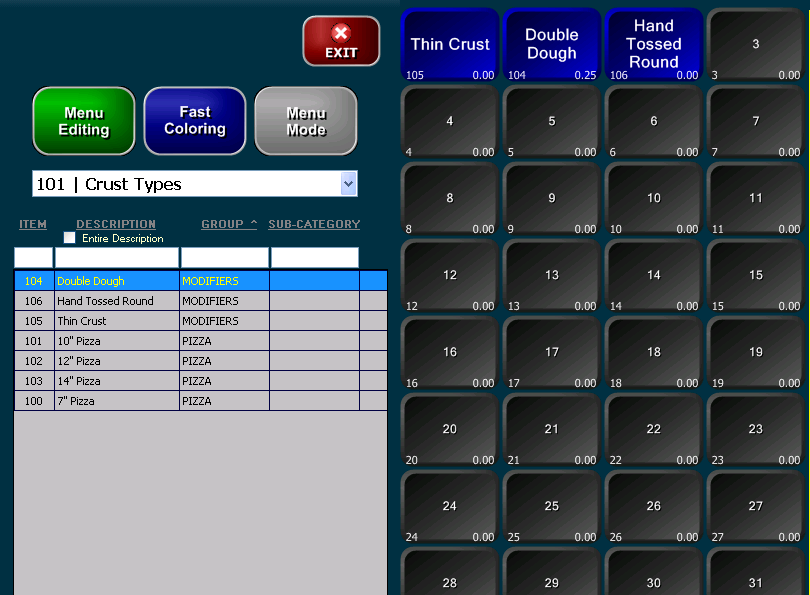
From there go to the menu button.
Notice the smaller group of buttons to the right that are separated by a gold bar. Those are category buttons that can be used to navigate to the main sections of the menu. To name a category button right-click on the category button 0 and select Set Menu Description. You can also change the color and text size from that same right click menu. To create a menu item click on menu editing and add new menu item
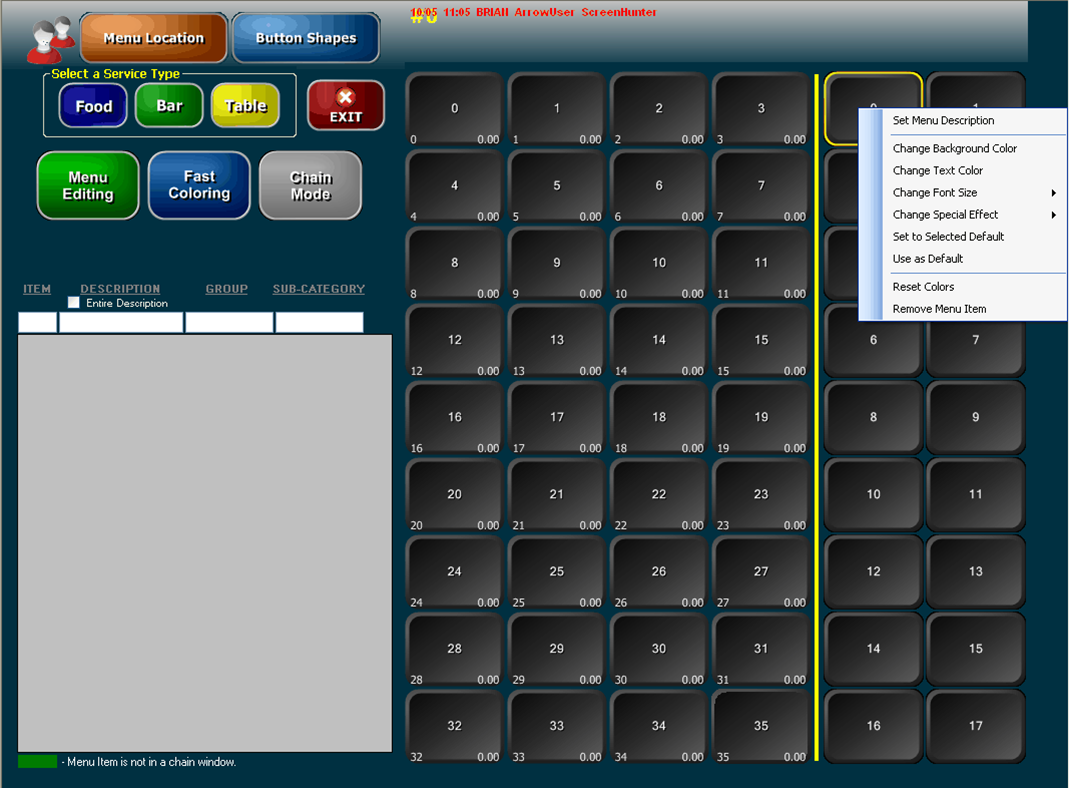
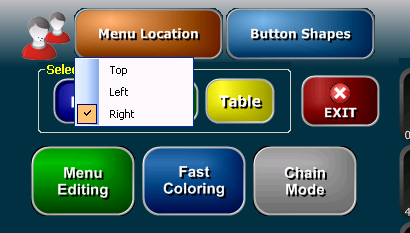
Also, note that you can change the location of the category buttons to the top or the left side using the Menu Location button at the top left of the screen.
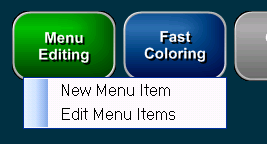
To create a single menu item click on menu editing and add new menu item.
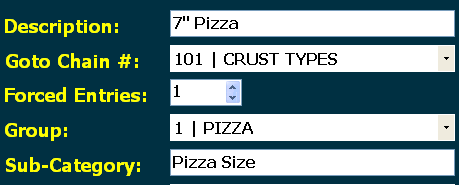
You are first prompted to enter the description of the new item.
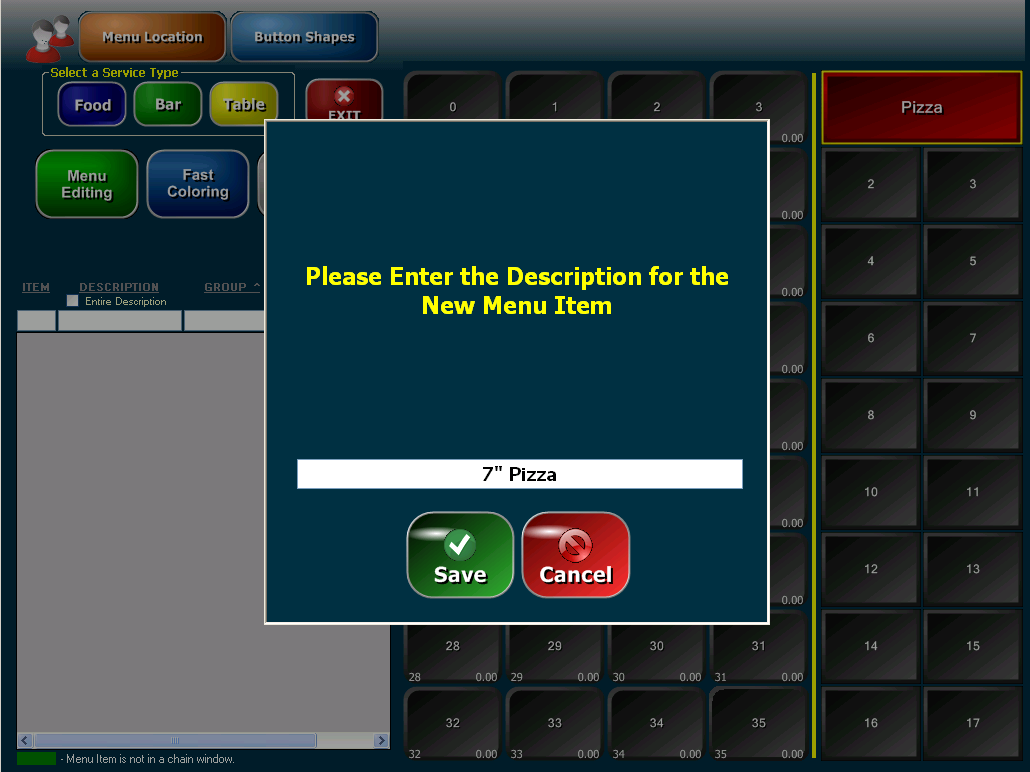
This is the configuration screen for a new menu item:
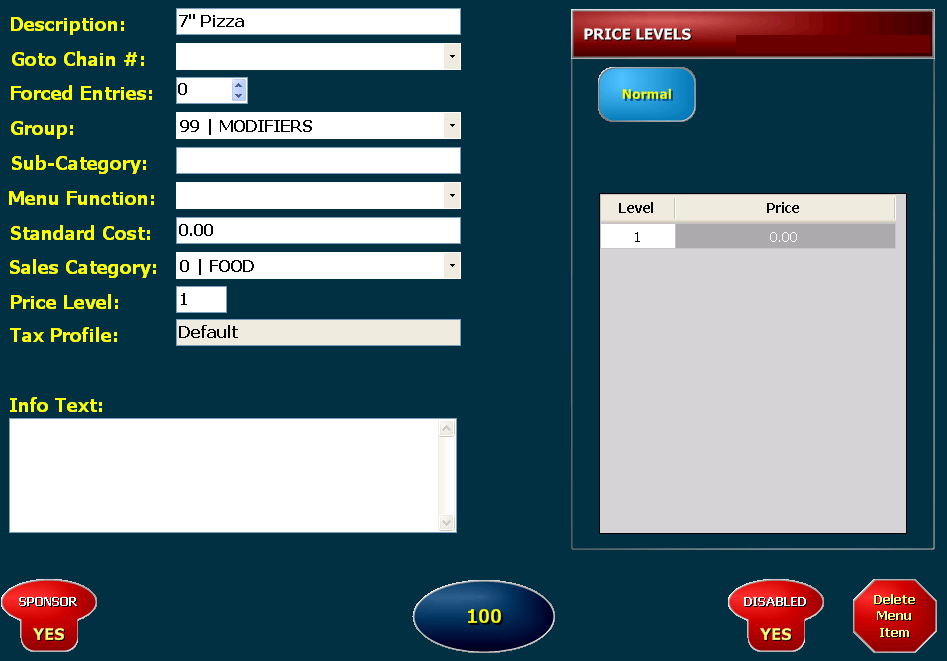
In this example, we are going to change the Group to Pizza, ![]()
the Sub-Category to Pizza Size, ![]()
and the Sales Category to Food. ![]()
Leave the Price level as 1 (on the left) and give the item a price on
the right. 
Click the Close button on the top right of the screen. NOTE: the item saves automatically by default
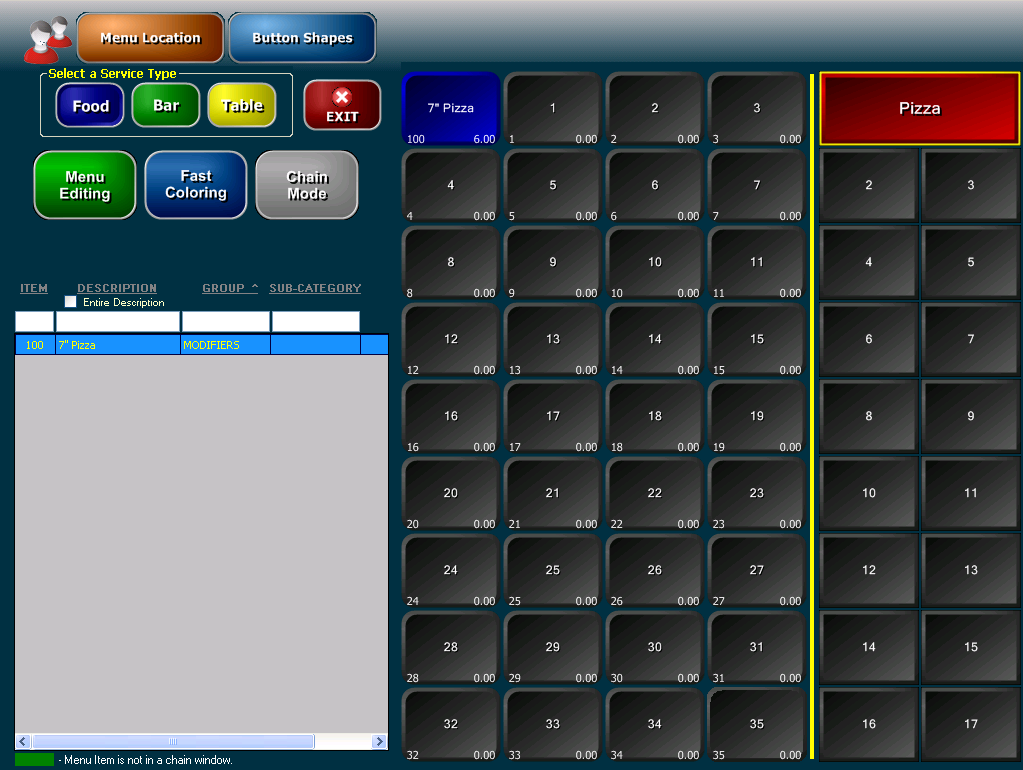
The item now appears on the left side of the Menu Setup Screen. You can click and drag any item from the list on the left to the Menu Board on the right.
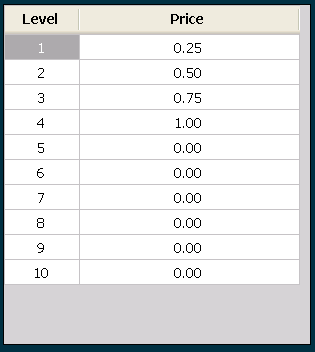
Follow the same steps to create menu buttons for your other pizza sizes, but
give each size a different price level. ![]()
In this example, the levels will follow accordingly - 7" Pizza - Level 1, 10" Pizza - Level 2, 12" Pizza - Level 3, 14" Pizza - Level 4.
We are also going to create 3 additional menu buttons that are Modifiers for crust type. We will use these modifiers in a Chain Window to force the employee to choose a crust type. But first, here are a couple things you should know about modifiers:
- Modifiers do not use a price level.

- Modifiers rely on the item they are a part of to provide the price level.
So we can set up pricing for modifiers to be associated with up
to 10 different price levels.
![]() How To Create A Chain Window
How To Create A Chain Window
To make a chain window click on the chain mode button on the left hand side. From the drop down list click new chain. Name it crust types. After you name the chain, you can drag over the modifiers you want to appear on that screen.
We are now ready to attach this chain to the Pizza Size buttons we created earlier. But first, we need to refresh the menu so we can use the chain. To do this, simply exit the Menu Setup screen and go back in. You will see a quick message that says "Loading Menu" as you enter back into Menu Setup.
To Attach the Chain, click on the pizza size button that you created to go
back into that item's configuration. Click the drop down menu for Goto Chain #:
and choose the CRUST TYPES chain that you just created. You can also choose to
force an entry on this chain window. For this chain, we will force an entry of
1. This will make it to where the employees have to pick one of
the options in the chain window before it will let them move on.
Do this for
each size of pizza.
![]() How To Edit Menu Items - The Fast Way
How To Edit Menu Items - The Fast Way
If we made every menu button and chain window this way, it would take WAY too
long! So, now that we are comfortable creating menu buttons one at a time, let's
take a look at an easier way. On the upper left side of the Menu Edit screen
click Menu Editing and then Edit Menu Items.
Here is an example of the window that pops up. 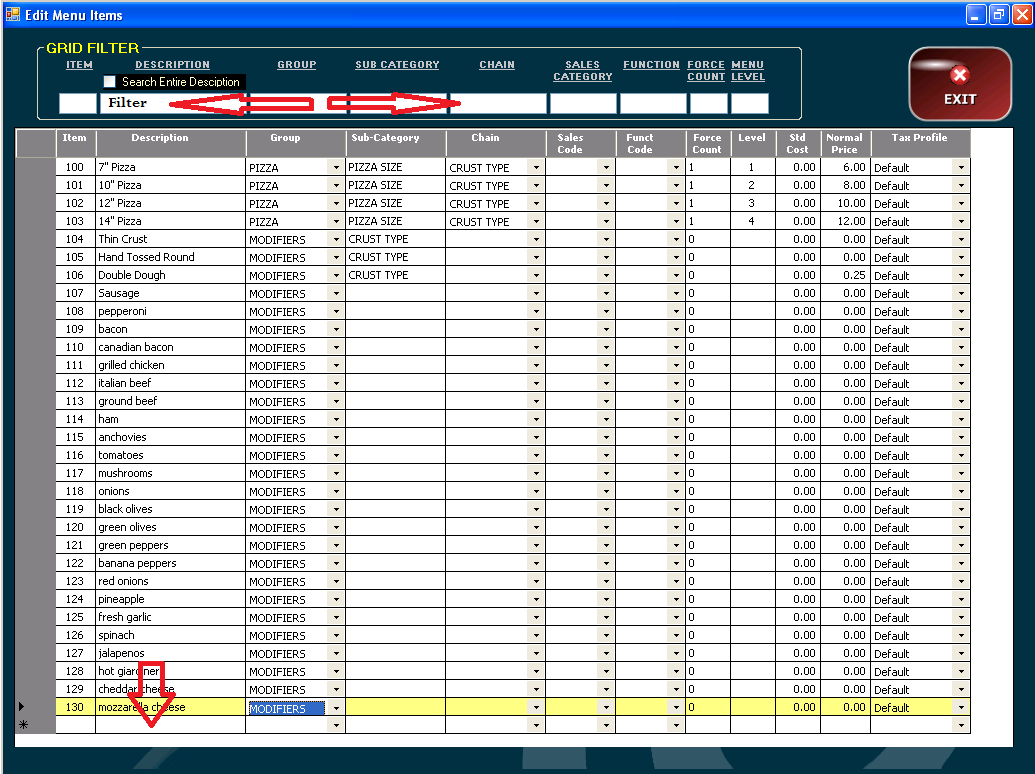
To enter new menu items type in the available description box below the last
item in the list. When you hit enter, the group fills in automatically based on
the previous item.
Note the Filter boxes at the top of the screen. Also, you
can sort the columns by clicking on the column headers.
We STRONGLY recommend using the subcategory field for modifiers, and whatever else you feel appropriate. It will make life easier in the long run!
As you can see, we need to enter a subcategory for each of the modifiers we
already typed in. To do this, type the info in the subcategory box of the 1st
item in the list that you want to change. Right-click on that cell and choose
Fill From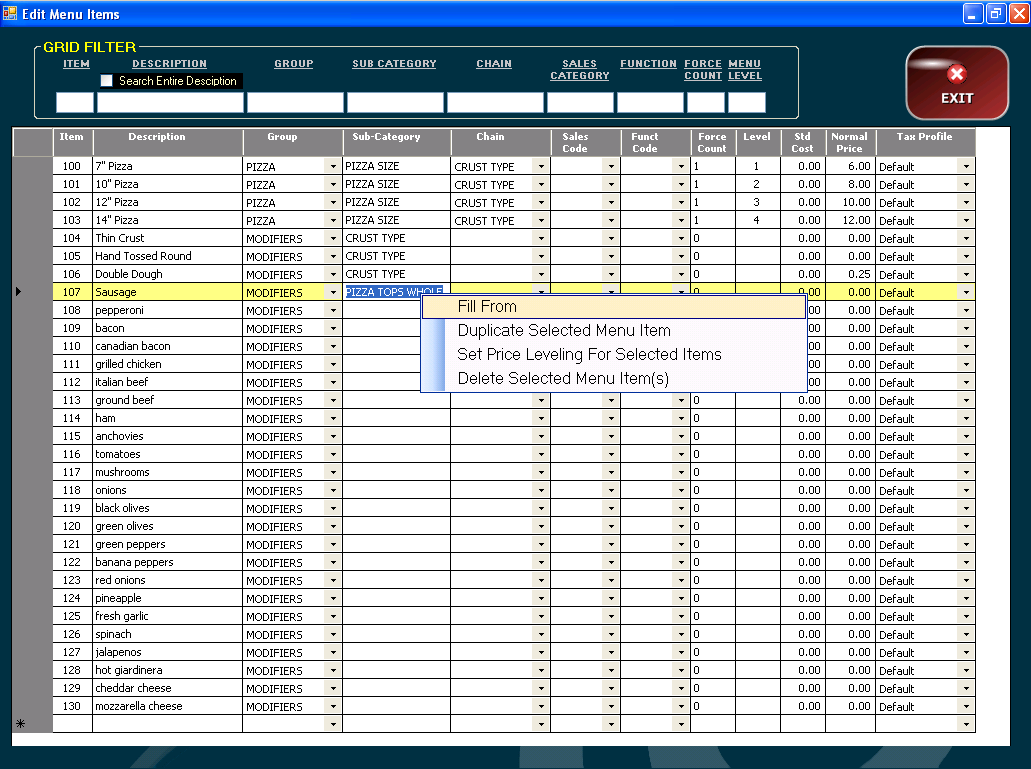
Then right-click the last item you want to fill that data to and choose Fill
To. 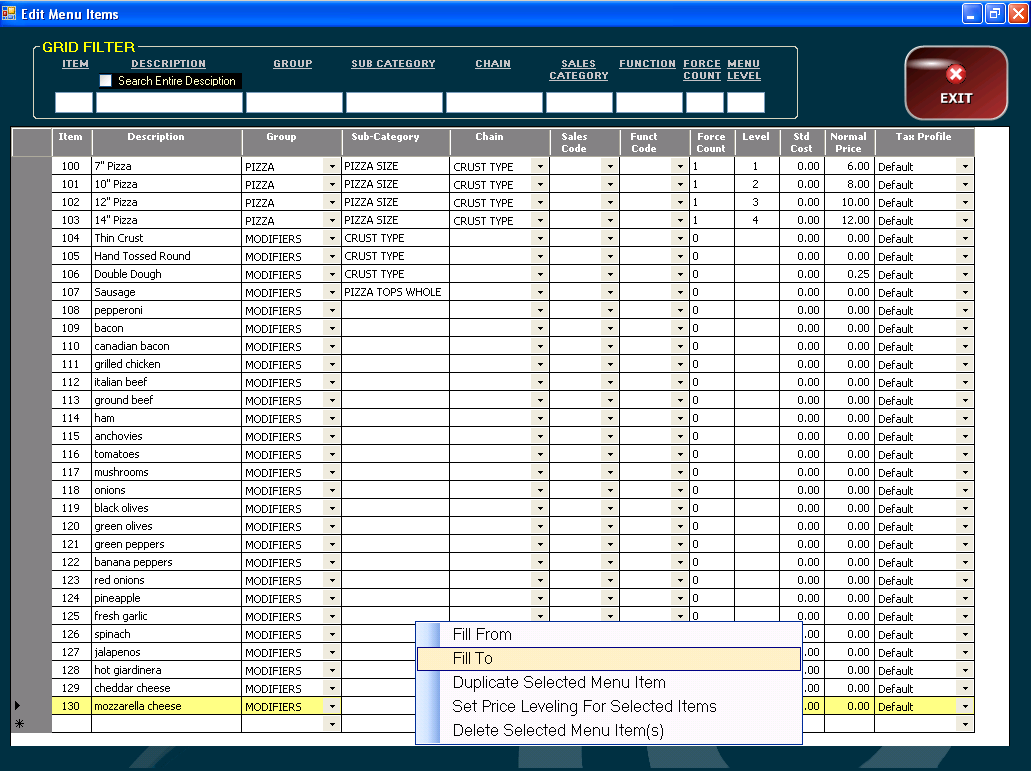
Confirm your choice and it will fill the data to all Cells.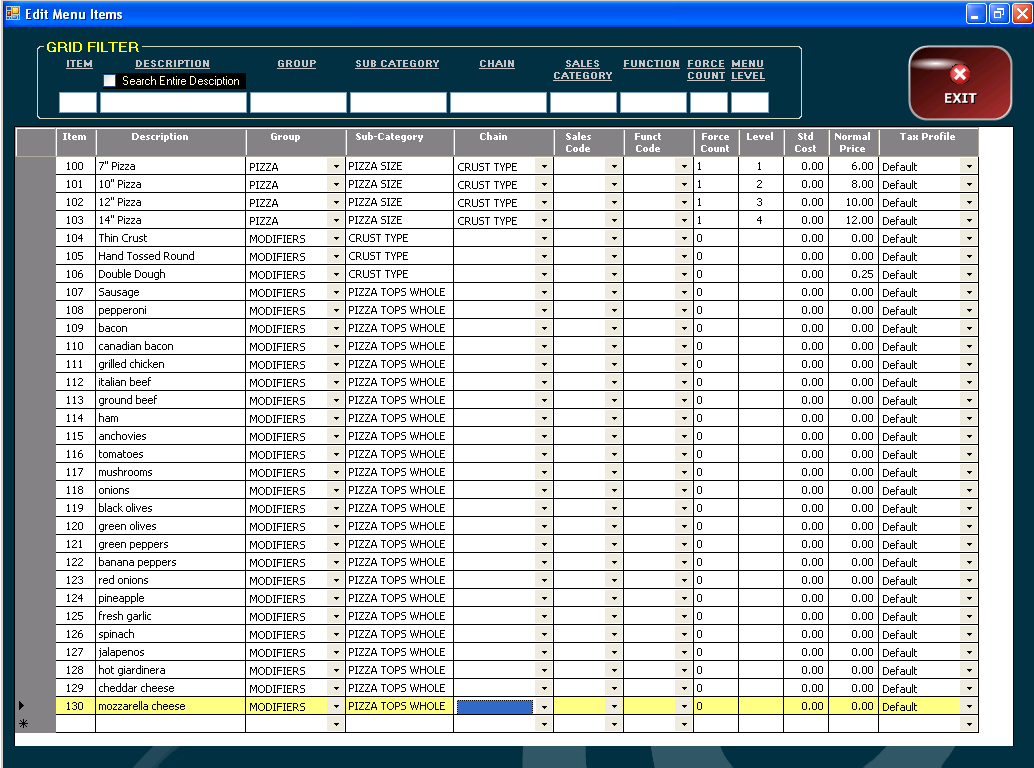
You can fill data this way for all columns, including price. However, as we
learned earlier Modifiers can have MULTIPLE prices and in this screen we can
only see the price for level 1. This is no problem though, we can simply select
all items that will have the same price by clicking and dragging the mouse
cursor on the left side of the screen in the gray bar. Right-click in the gray
bar and choose Set Price Leveling For Selected Items.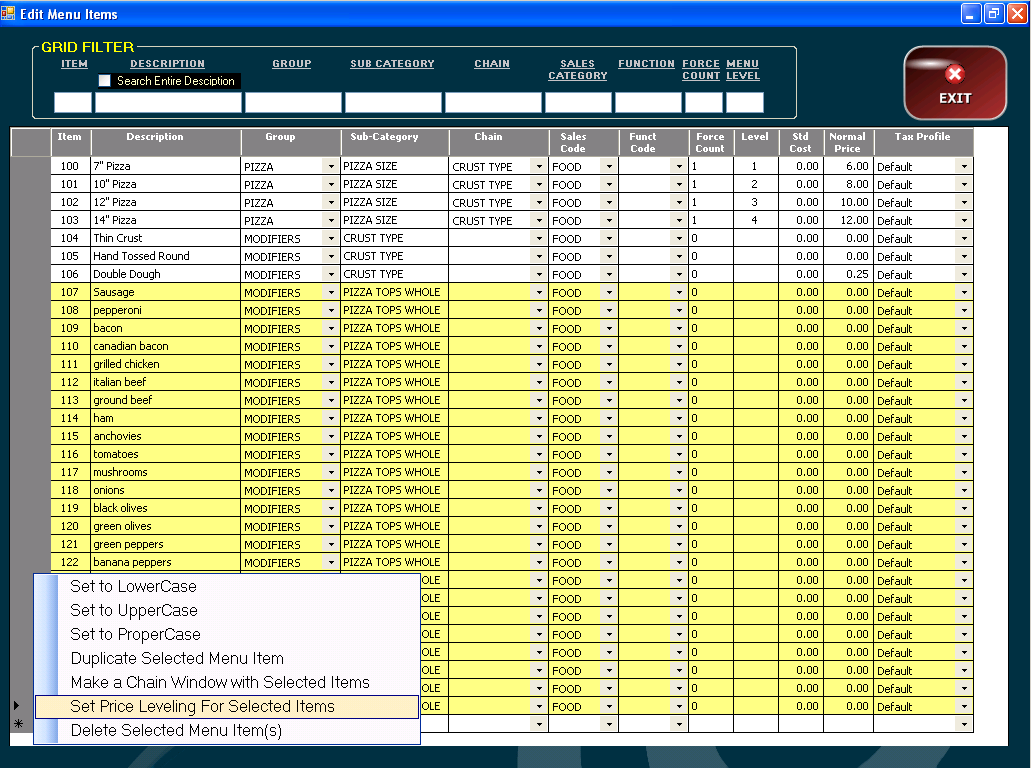
The next window allows you to enter prices for multiple levels. Note the drop
down menu above the prices - from here you can choose an existing menu item that
you may have already priced as a template. Save the pricing then hit CANCEL to
exit.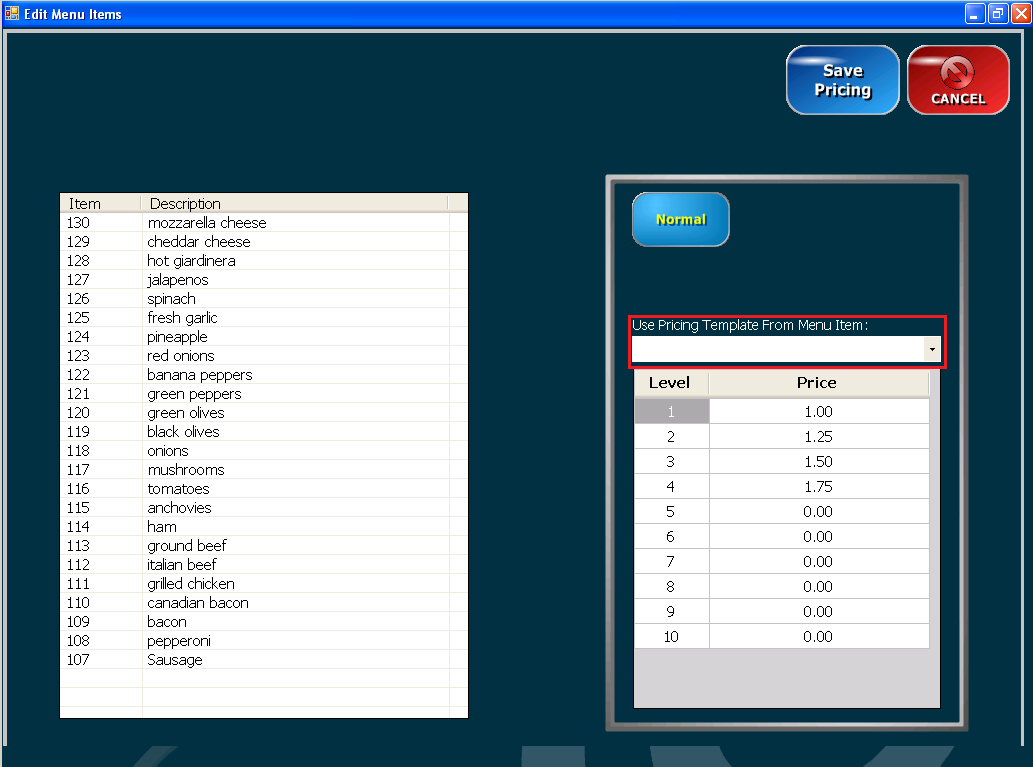
Get yourself back to the menu layout screen and you will see all the items you just created in the list on the left. Click and drag them where you want them.
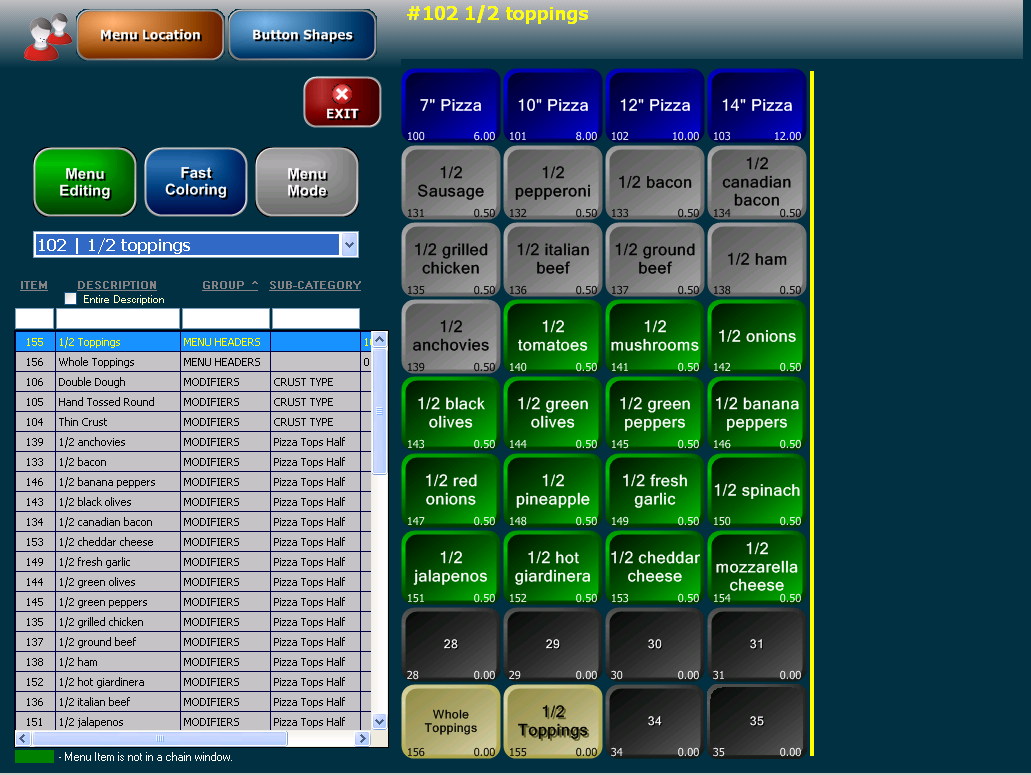
Now, let's take a look at how to create half toppings. In a typical
menu, half price toppings are actually a separate menu item than their full
topping counterparts. We could of course type out all the toppings again and
price them appropriately, but we have an easier way to do that.
Go back to
the Edit Menu items screen and select all of the modifiers (full pizza
toppings).
Right-click on the left and choose Duplicate Selected Menu
Items.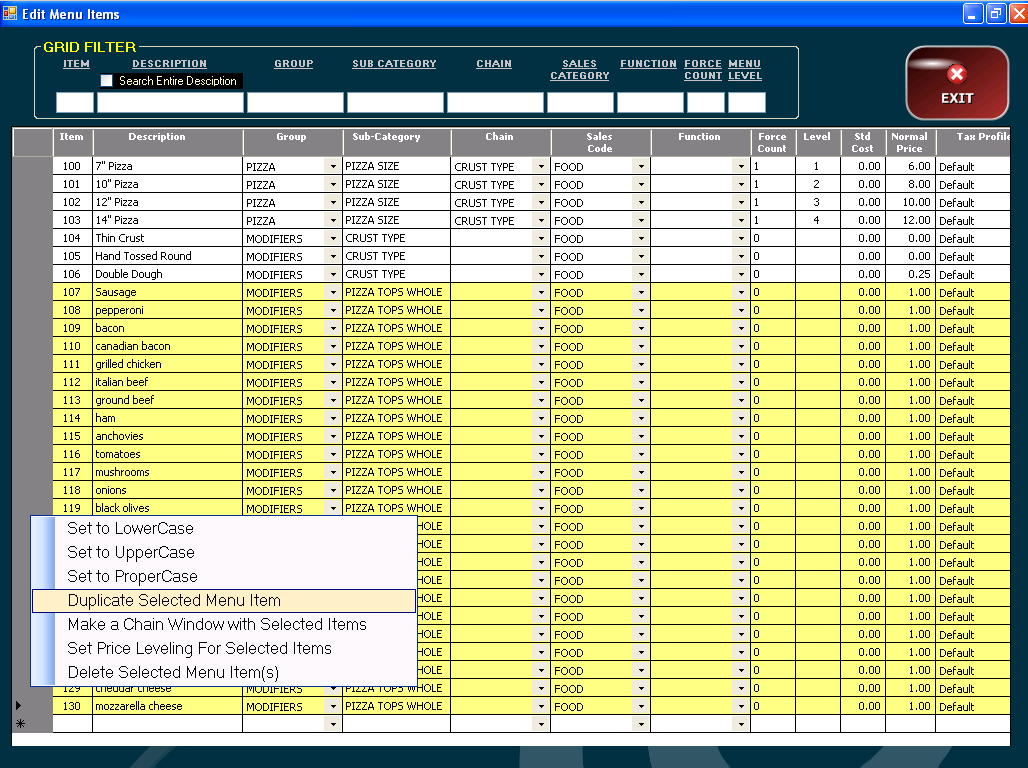
It will prompt you "Would you like to add a prefix to these menu Items?" - Choose Yes and type in "1/2" or some other prefix to distinguish between these toppings and the full toppings you already created.
It will then prompt you to enter a subcategory. Type in "Pizza Tops Half"
Once the Half Toppings are created, you can select all of them and Set Price
Leveling appropriately
You can also create a Chain Window from this screen by selecting multiple items and right-clicking in the area on the left. If you choose this option the system will create the chain with the buttons in the order that you selected them. When you go back to the menu layout you can organize the buttons further and add color. We suggest that you put the toppings in the same order on both the whole toppings and the 1/2 toppings page.
![]() Half Toppings Vs Whole Toppings - Navigation
Half Toppings Vs Whole Toppings - Navigation
In the previous section we duplicated whole toppings and changed the prices
so we could use them as 1/2 toppings. We also need 2 navigational buttons to
allow the user to bounce back and forth between whole toppings and 1/2 toppings.
These buttons are going to be group 99 - Modifiers as well, so they will print
on the ticket.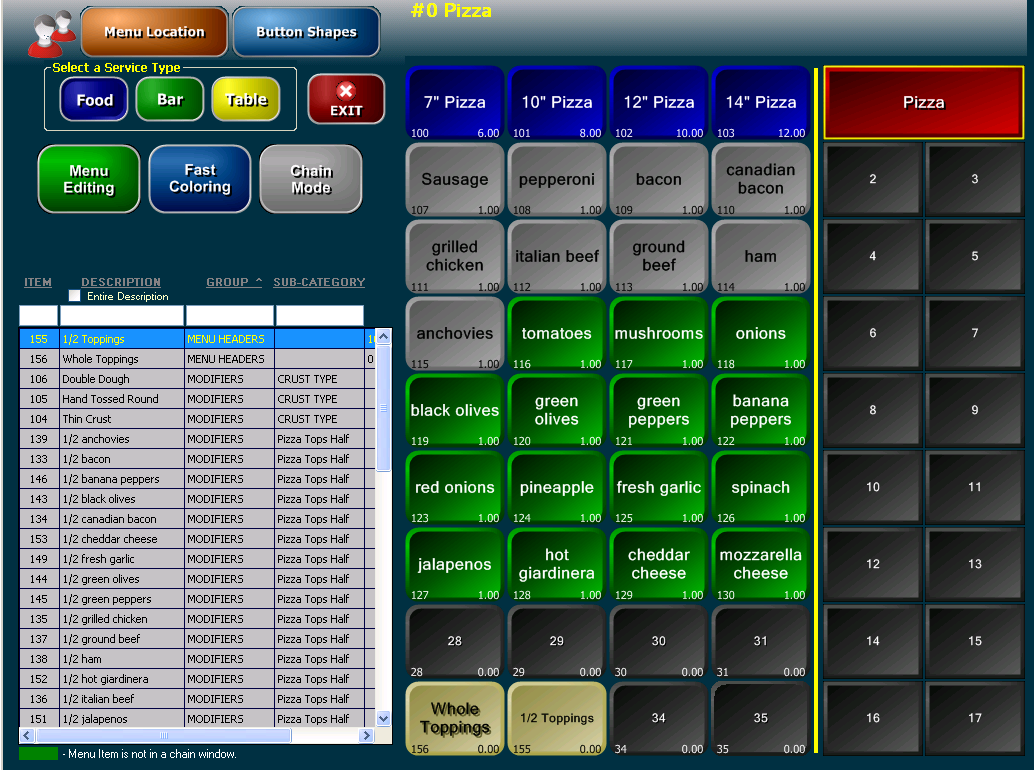
![]() Menu Headers
Menu Headers
Another type of menu button that we need to know about is a Menu header. This button is going to use Group 69 - Menu Headers , should have a blank price level, and does not need a price. Menu Headers do not print to the kitchen, so they are ideal for navigating throughout the menu when using the main category buttons isn't ideal. The Goto Chain option should point to the desired chain - in this case, a Pizza Mods chain.
Of course you should create the menu buttons and the chain
window first.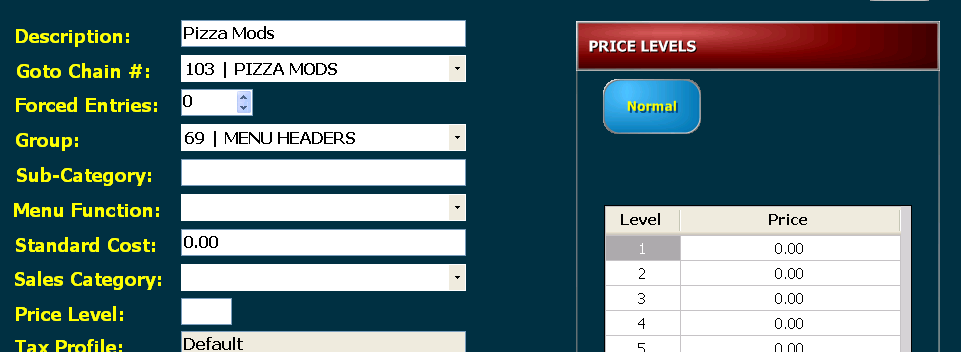
![]() Specialty Pizzas
Specialty Pizzas
Specialty Pizzas can be handled in 1 of 2 ways.
- Create the Specialty Pizzas as Modifiers and use price levels to charge
the difference between a cheese pizza and the Specialty Pizza for each
size
For example: Our Cheese Pizza Prices are $6, $8, $10, and $12.
Supreme Pizza Prices are $10, $13, $16, and $19.
So the Modifier Price for Supreme would be $4, $5, $6, $7
The advantage here is that we can use the modifiers with Half & Half specialty pizzas, or Half Specialty, Half Build Your Own - Create the Specialty Pizzas as Main items and have a different button for
each size
7" Supreme
10" Supreme
12" Supreme
14" Supreme
The advantage to this is that specialty pizzas read on one line instead of 2, but we lose the ability to do half and half specialty pizzas
![]() Menu Functions
Menu Functions
There are several special functions that menu items can perform to make order
taking easier. ![]()
- G | ARROW GIFT CARD - this function make it possible to sell and reload gift cards that can be tracked through ArrowPOS. (Note: this option is NOT for gift card processing through an outside merchant)
- L | LIST ITEM - This function will automatically ring up all menu items in the chain window that is attached to the item. For example, if you wanted to automatically list all ingredients on a sandwich, you could create a chain window that contains the ingredients for the sandwich and then choose that chain in the "Goto Chain #" option for the item. If this option is chosen, when you select the sandwich it will ring up the sandwich followed by all the toppings in one shot. This option is also used frequently with catering packages.
- LD | LINEITEM DISCOUNT - This function is used to discount a percentage of an item. Most commonly, this function is used in conjunction with a price level of 1, Menu Group of 44 (Password Protected Coupons), and a price of 0.XX where XX equals the percentage off of the item desired. (for example 0.25 would be 25% off.)
- MG | MERCURY GIFT CARD - This function is used for a new sale of a gift card when processing through Mercury Payment Systems.
- MGB | MERCURY GIFT CARD BALANCE - This function is used to check the balance of a gift card when processing through Mercury Payment Systems.
- MGR | RELOAD MERCURY GIFT CARD - This function is used to reload a gift card when processing through Mercury Payment Systems.
- MP | MATRIX PRICING - This function is used when using Matrix Pricing instead of Leveled Pricing. For more information, please see our section titled "Matrix Pricing Set Up"
- OPEN | OPEN ITEM - This function is used to trigger the user to put in the amount of an item. The price would be left at $0.00 in the menu item configuration page.
- Q | MUST ENTER QTY - This function is used to trigger the user to put in the quantity desired of a certain item.
- TD | TOTALORDER DISCOUNT - This function is used to discount a percentage of the ENTIRE order. It is set up the same way as a LineItem Discount.
![]() Other Menu Options
Other Menu Options
A couple other menu options that we have not covered are
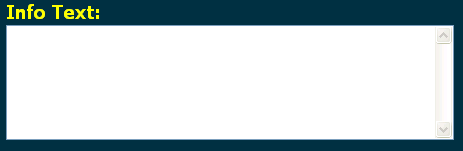
Info Text can be used to to enter information about a menu item. the user can then see that item by pushing and holding on the menu button during an order and will be able to see whatever is typed in this field.
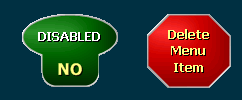
DISABLED (YES/NO) is a toggle button and can also be reached by holding down on the menu button from the order screen.
Delete Menu Item is irreversible.