Misc. Settings
The Misc. Settings menu allows you to edit/add/delete features such as delivery zones, area codes, food groups, and systems messages. Please review all categories listed below so that you are familiar with what options you have access to change. If you are unsure, call Arrow POS support. The tabs shown on this screen are explained in the Misc. Settings sub-categories in this guide.
Activity Log
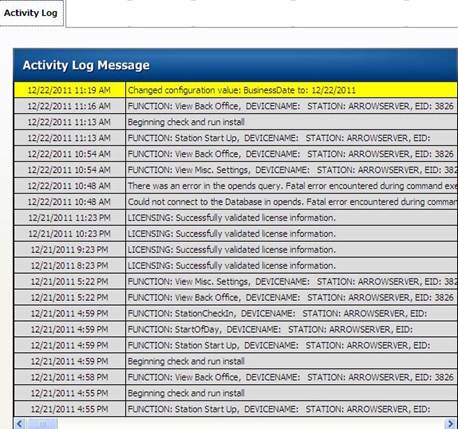
Here you can
view a record of the activity on the system.
Application Categories/Applications
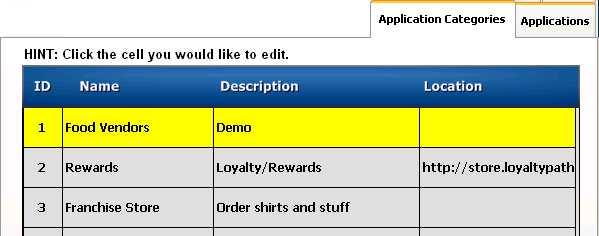
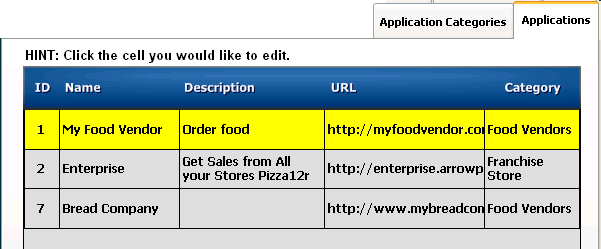
By default these tabs are blank. These tabs are for ArrowPOS technicians only. Individuals who are not ArrowPOS staff should not have access to these tabs. Application Categories are used to create what we call hot buttons in the Back Office screen. Please refer to the images below for reference. This feature is great for customers who need to access a website or group of websites without having to exit the software. If the location column is left blank, the category buttons will take you to another screen where the application buttons are. If you want the category button to take you directly to a web site, just put the url directly into the location column. (Remember, always begin the url/location with http:// or https://)
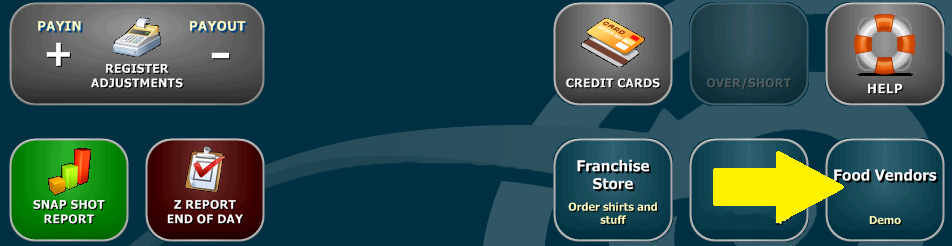 <~~Hot
buttons
<~~Hot
buttons
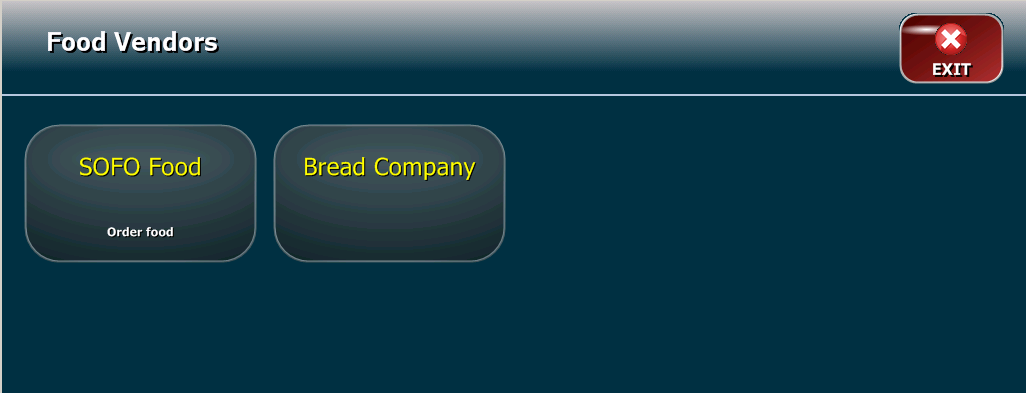
Applications behind the Food Vendors Application Category
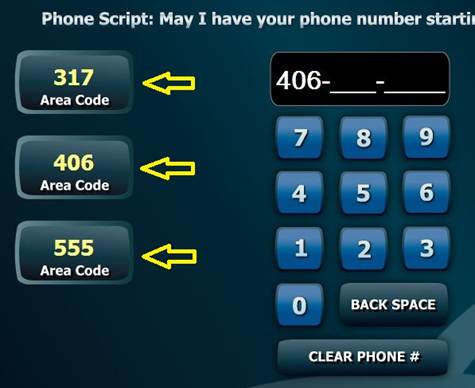
Area Code
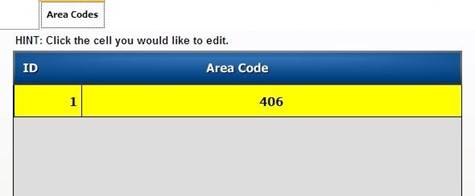
This allows you to enter multiple area codes for quick selection when entering a phone number. This feature is especially helpful for a location that receives orders from customers with different area codes.
Arrow Staff
By default this is blank.This tab is for ArrowPOS technicians only. Individuals who are not ArrowPOS staff should not have access to this tab.
Cash Drawer

The
cash drawer tab shows what cash drawers you have connected to your network. It
displays the ID number, Name, Display Name, and Type.The
ID associated with your cash drawer is used to tell the station which cash
drawer to open. If desired, a cash drawer can be opened from multiple stations
if that cash drawer is associated with multiple stations by its ID. If the
cash drawer is printer driven, the Name field has to be exactly the same as the
printer name in windows, if multiple computers will open the same drawer a
shared name must be displayed (ex \\ArrowServer\RecServer).
Display name can be any name you would like to name it (ex. CD1 or Cash Drawer
1). Type refers the type of method used to pop the cash drawer. There are four
different times OPOS, PIN, PIN2, PRT. The OPOS Setting is for serial cash
drawers that require OPOS driver.![]()
The Pin Setting
is for Printer Driven Cash Drawers.![]()
The Pin2 Setting
is the same as above only some printers come with two cash drawer ports, refer
to the image below. CD1 is for cash
drawer 1 and CD2 for cash drawer 2.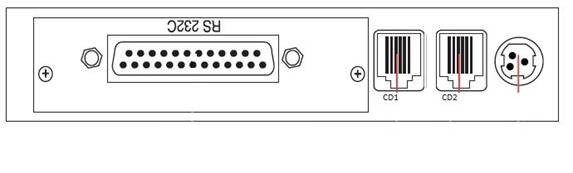
The PRT setting is designed for serial cash drawer that can use generic printer drivers to open the cash drawer. They are setup exactly like a printer
in Windows. When using such printer the PRT Setting must be enabled in order to pop cash drawer.
![]()
City, State , Zip
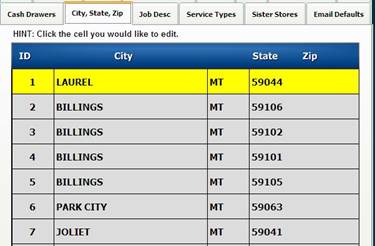
Add new cities to quickly auto-fill customer information screen when entering information for a new customer. The same city can be entered with multiple zip codes for auto-fill of all three categories, or zip code box can remain empty for manual entry when entering customer data.
To add simply
click ADD NEW CITY and enter the city state and zip (For technician : I like to
use http://www.zip-codes.com/zip-code-radius-finder.asp to find radius
address by distance in order)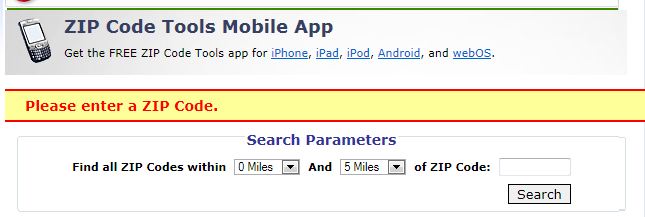
Insert the zip
code and this will appear: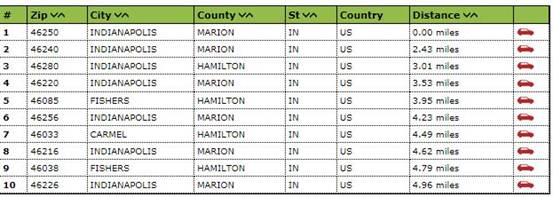
Add the City, State and Zip (ex. Image below )
Email Defaults
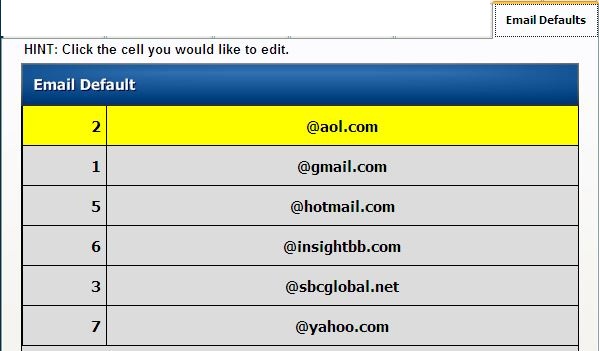
Use this to set email domains for quick selection when entering customer information. Email suffixes can be added/edited/deleted as necessary. This option makes collecting email addresses for marketing quick and easy!
Start by clicking on ADD NEW EMAIL DEFAULT or by clicking on a pre-existing email default and changing it to the top email default in your area. Refer to the set of images below
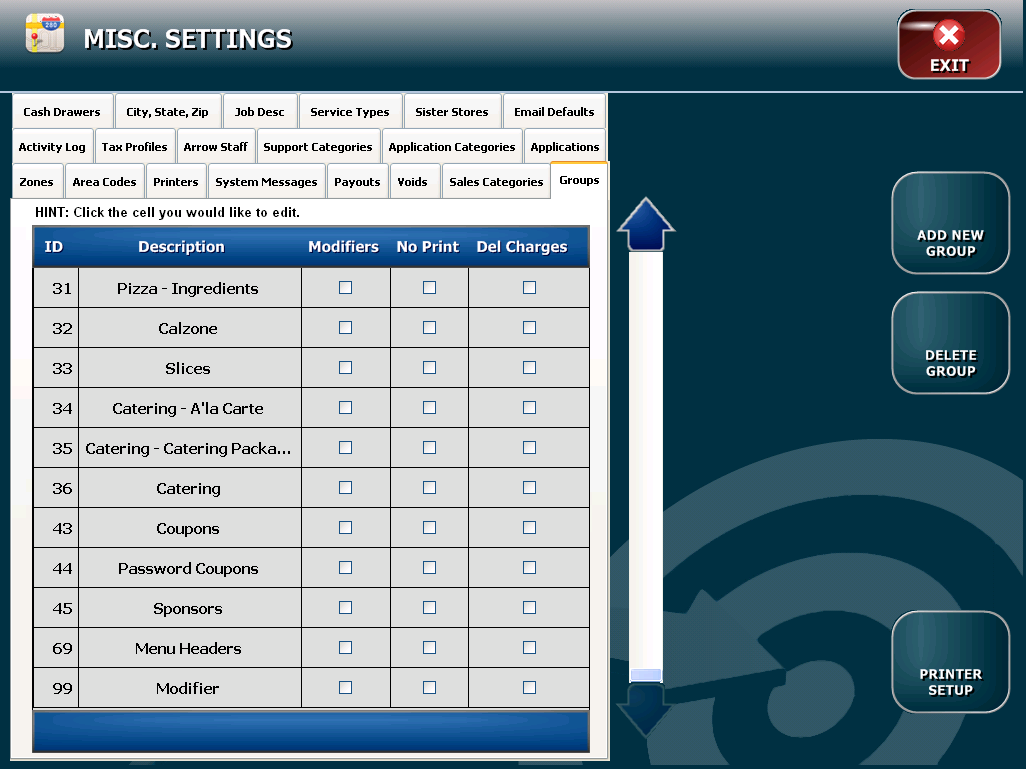
Groups
This tab allows users to add/edit group types and also select whether or not to print items or to apply delivery charges to menu items in each group
First you start out by adding an ID number then the name of the group. Some ID numbers are
reserved like 99 for Modifier, 43 for Coupons, and 69 for Menu Headers; these numbers are set aside and cannot be used.
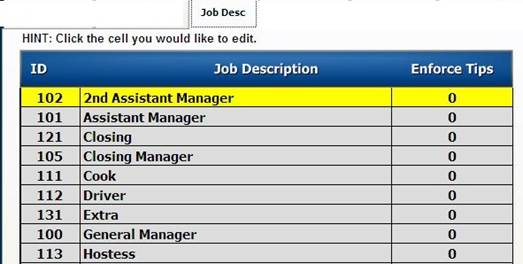
Job Desc
Add/edit/delete
various job descriptions to associate with your employees. Enter the Job
Description ID number in to the employee information when adding an employee.
The enforce tips column toggles between 0 and 1. If set to 1, the employees with
a pay rate in that job description will be required to enter cash tips when they
punch out for the day.
The image below is an example of the show pay rates in the staff screen when entering a new employee as you can see the job descriptions entered in misc settings > job desc are auto populated.
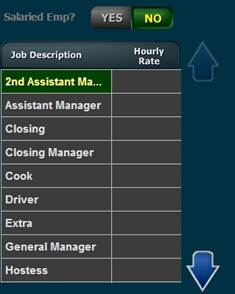
PLEASE NOTE: If you delete a job description in Misc. Settings where employees were assigned an hourly rate, the hourly rates will need to re-entered under a different job description for accurate payroll. Pay rates would only be lost for the job codes that are deleted.
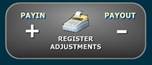
Payouts
For more information about register payouts see: Main Menu > Back Office > Register Payouts
Use Register Payouts button to pay out any business expenses from the drawer such as vendor payments, supplies, and office equipment.
You can locate
register payout button in the back office
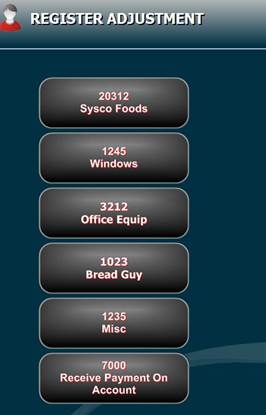
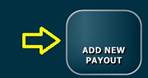
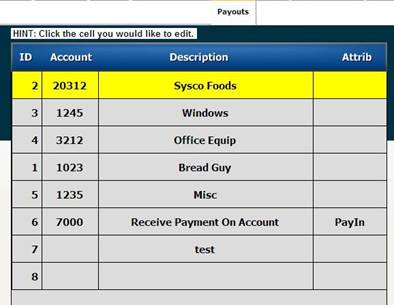
In the register payout screen you see different vendor you can change these vendor or add vendor to the list. Simply go to back office>configuration>misc setting and click on the payout tab, click on account or the description, and change the presets. You can also add a new payout by clicking on add new payout
Next add the desired description. After adding the description you can add the account information the ID will auto populate.
Printers
This shows all printers that are attached to the network from here a printer can easily be turned on or off, characters per line can be adjusted as well as the printer description.
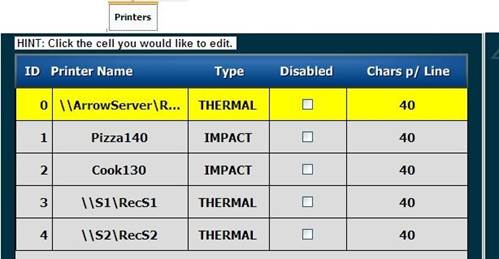
You can access Printer Setup from the Misc Setting menu. See instructions below for the setup instructions. Printer setup can be confusing, if you need assistance please call ArrowPOS Support.
Sales Categoies
Use this to
categorize menu items based on type: Food, Beverage, Liquor, etc. Categorized
menu items make tracking sales by type simple and convenient.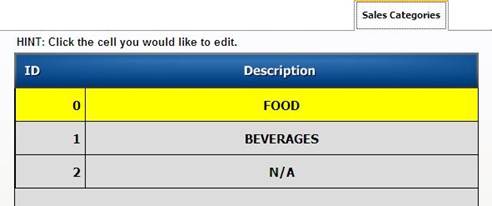
To add simply
click on ADD NEW SALES CATEGORY button then insert the description and click on
complete.
Service Types
Add/edit/delete various service types from this tab.
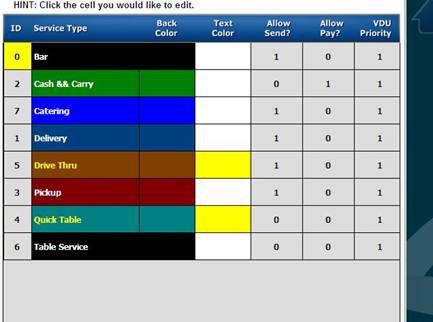
You add a service type by clicking the ADD NEW SERVICE TYPE button on the right side of the screen. The default service types shown above cannot be deleted, only service types created beyond these can be. You can edit a service type name by clicking on the service type. Changing a service type name DOES NOT change a service types functionality, however. (For example - Only service type 1 will put orders on the driver dispatch screen for delivery; only service type 6 is functional in the Table Service environment. You can change the back color and the text color of the service types by clicking on the appropriate boxes on this screen. You also have Allow Send, Allow Pay, and VDU Priority. For Allow Send and Allow Pay, selecting a 1 or 0 allows you to turn these features on or off for individual service types. (1 = On; 0 = Off)
Sister
Stores
Here
you can input information about any sister stores you may be associated with.
This provides an at-a-glance reference to other stores in your network.
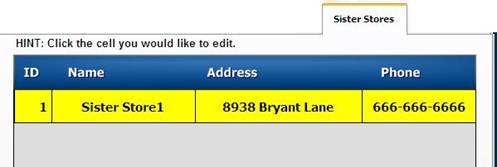
Simply click ADD NEW STORE and enter the information.
Support Categories
This tab is for ArrowPOS Technicians only. Individuals who are not ArrowPOS Staff Should not have access to this tab.
System Messages
This tab is for ArrowPOS Technicians only. Individuals who are not ArrowPOS Staff Should not have access to this tab.
Tax Profiles
Customize the tax profiles to be used when creating menu items. Multiple tax profiles allow items to be either taxed or not taxed depending on food/service type. Tax rate can be set as a percentage under the different tax rates and associated with a tax rate number under Default. Most commonly, the only place a tax rate needs to be changed is the default tax rate 1 box. Exceptions can also be allowed under each tax profile for certain service types.
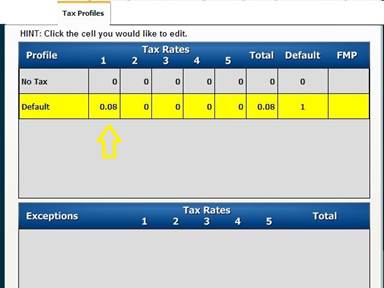
Enter the tax in decimal form inside the default tax rate 1 box illustrated in the image above. If the state has exception on tax for different service types you can add exceptions by clicking on ADD NEW EXCEPTION while default tax profile is selected. Then you can select Bar, Delivery, Cash & Carry, Pickup, or Quick Table.
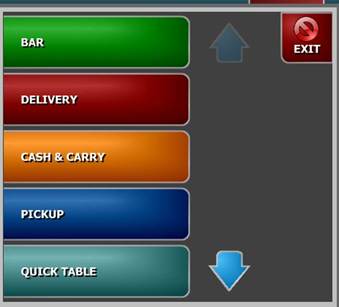
For example: This would be used in a situation where tax on all food and beverages is 8% except for bar items which sell at 8.75%
Voids
Use this to add/edit/delete reasons for voiding an order. User will be prompted to select from the list when voiding an item/order.
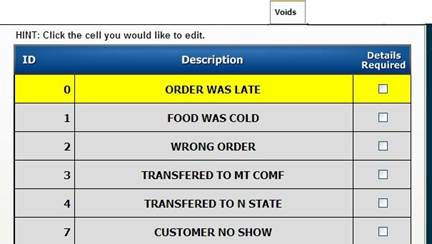
To add simply click on ADD NEW VOIDS button or click on a pre existing one and change it also you can check the Details Required box to force the user to enter details.
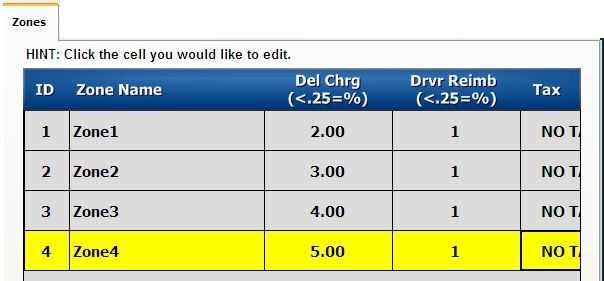
Zones
This allows you to add/edit multiple delivery zones. The delivery charge can be varied for each zone based on its distance from the store. Order takers can select from different zones when entering customer information. Also Drivers can have different reimbursement for the varied zones. To add click on the ADD NEW ZONE button. Then click in the different boxes to add information. In our experience, most states/cities do not allow tax to be charged on services such as delivery. So remember to change this to no tax unless told otherwise.